
9 Must-Have Accessories for Home Coffee Roasting In 2026
Last updated on January 26th, 2026 at 04:35 pm
Ever felt your coffee should taste better… but it never quite gets there?
When I first started roasting my own beans, I had a popcorn popper, a handful of green coffee, and way too much confidence. I honestly thought I’d be drinking café-level coffee by the end of the week.
Yeah… no.
My early roasts were all over the place. Some batches came out burnt and smoky, others tasted flat and weirdly “empty,” and a few were so uneven I had light beans and dark beans in the same roast. It was frustrating, mostly because I knew the coffee itself was good, and I felt like I was ruining it.
But I didn’t quit. I just started adding the right tools little by little.
First, a digital scale so I could stop guessing my bean weight. Then a thermometer so I could actually track what was happening. And once I added a proper cooling method? That’s when things finally started clicking.
This guide is basically the accessories I wish I had from day one. The ones that make home coffee roasting easier, cleaner, and way more consistent. Whether you’re getting started or trying to tighten up your results, these picks will help you roast with less stress… and way better coffee.
Ready to roast at home? ☕ Discover Top Home Coffee Bean Roasters and enjoy fresh, flavorful coffee every day.
9 Best Coffee Roast Accessories (With Product Picks)
Here are my favorite coffee-roasting accessories that make a difference, along with the exact products I’d pick to make home roasting easier, cleaner, and way more consistent.
1 – Coffee Roaster Machine for Consistent Roasts
If you’re roasting coffee at home, a coffee roaster isn’t just a “nice extra”; it’s the difference between fun experiments and actually repeatable results.
Because here’s what nobody tells you at the start: roasting isn’t hard, but it is sensitive. A small change in heat, airflow, or roast time can flip your cup from sweet and chocolatey to flat, smoky, or sour. And when you’re using a pan or a random DIY setup, you’re basically guessing the whole time.
A proper home coffee roaster gives you control over the two things that matter most: heat and airflow. It keeps the beans moving so they roast evenly. It helps you avoid scorching, and it lets you build a routine you can repeat.
Also, roasting goes fast. Like, “wait, is this already first crack?” fast. So having a machine with a clear display and controls makes the whole process feel way less chaotic.
What do I recommend?
If you want a roaster that’s beginner-friendly but still gives you real control, I recommend the Fresh Roast SR800.
It’s the kind of machine that makes you feel like you’re roasting coffee, not just burning beans and hoping for the best. You get variable heat and fan control, plus a digital temperature display, so you can react in real time instead of guessing.
And the batch size is solid too. It roasts about 6 to 8 oz (170–226g) per batch. That’s enough that you’re not stuck doing tiny little roasts every day.
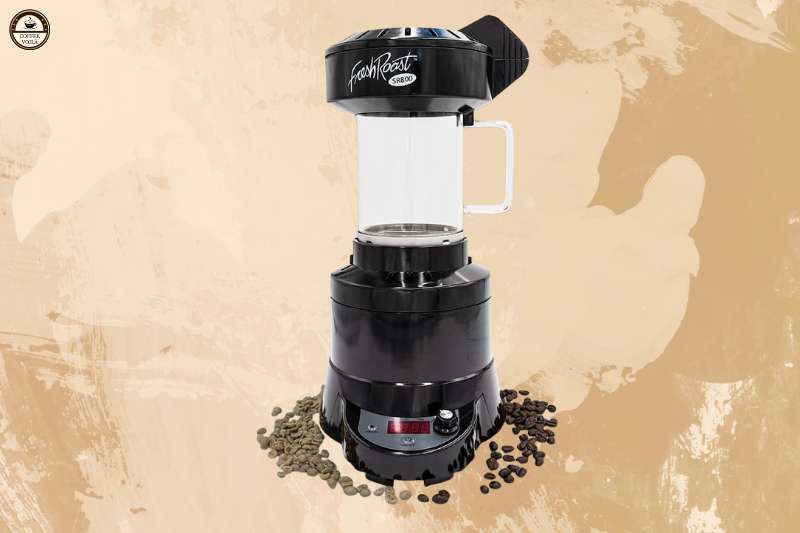
One of my favorite things about it is the workflow: you can roast a batch in under 10 minutes, then hit the cooling cycle and you’re done.
It’s also very hands-on. You’re adjusting fan speed to keep the beans moving, nudging heat up, listening for that first crack around the 6-minute mark, and finishing around 8 minutes if you want a medium-dark roast without going oily.
Just a heads-up though: since it’s manual, you do need to pay attention. And some people report the control knob/button can get temperamental after a couple years. But overall? For the price, it’s one of the easiest ways to get consistent, fresh-roasted coffee at home.
2 – Digital Coffee Scale for Precision
If you’re roasting coffee at home (or even trying to brew better coffee), a scale is one of those things you need sooner or later.
Because once you start paying attention, you realize how much your coffee changes when you’re just eyeballing everything. One day you scoop “about the same amount,” and it tastes great. Next day it’s weirdly bitter or weak, and you’re standing there thinking… what did I even do differently?
A digital coffee scale fixes that problem fast. It helps you measure your coffee and water by weight, so you can repeat the same recipe every time. And it’s not even about being obsessive, it’s about consistency.
Even a small difference (like 2–3 grams of coffee or a slightly heavier pour) can shift the flavor more than people expect.
It’s also a big help for pour-over and espresso, because timing matters too. If you’re roasting your own beans, dialing in becomes way easier when you’re not always guessing the dose.
What do I recommend?
If you want a scale that feels “serious” without being complicated, I suggest the TIMEMORE Black Mirror Basic 2.
It’s accurate down to 0.1g, goes up to 2kg, and it has a built-in timer. The battery life is also ridiculous. It charges with USB-C, and some people use it daily and barely ever have to plug it in.
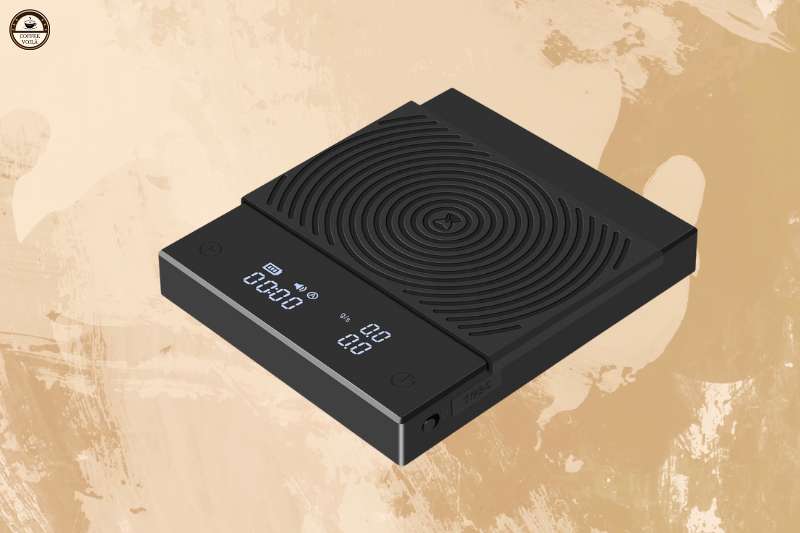
Plus, the flow-rate feature is great for pour-over if you want to control your pour instead of dumping water and hoping.
Quick heads-up though: the touch buttons can feel a little annoying sometimes, and the auto-timer can pause if you lift your brewer to swirl. Not a dealbreaker… just one of those little quirks.
But overall? It’s one of the simplest upgrades you can make if you want better coffee without overthinking everything.
3 – Coffee Bean Cooler for Efficient Cooling
This one sounds optional until you roast coffee a few times and realize the roast doesn’t stop when you turn the heat off.
For instance, you pull the beans out, you feel proud, you’re already imagining that first cup… and then five minutes later you smell it. That slightly smoky smell.
Because the beans are still hot. They’re still cooking themselves. And if you’re aiming for a sweet medium roast, that extra heat can make them bitter before you even notice.
Cooling is one of those boring steps that makes a massive difference. It locks in the flavor you worked for. It helps prevent over-roasting, keeps your beans cleaner, and makes the whole roasting process feel more controlled instead of chaotic.
I used to do the classic colander + fan setup. It works, technically. But it’s slow, messy, and if you’re roasting indoors, the chaff ends up everywhere. So, a proper coffee bean cooler is basically your shortcut to consistency.
What do I recommend?
I recommend the DYVEE Coffee Bean Cooler. This thing is built for one job: cool beans fast. And it does it fast. It uses a powerful fan system (the airflow is no joke), and most people are cooling beans in about 1–2 minutes. Some even get them done in under 90 seconds if they stir the beans while it runs.
And that speed matters more than you’d think. Fast cooling = cleaner flavor. Less “baked” taste. More of that fresh roasted sweetness.
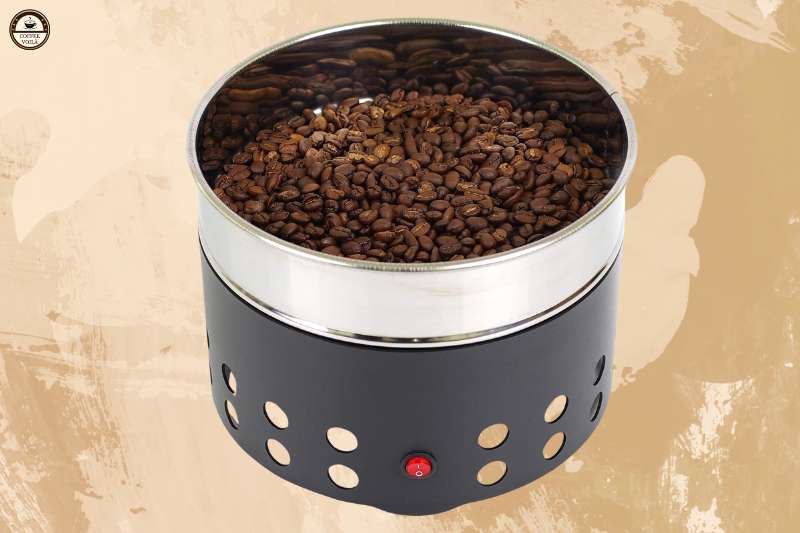
The design is also smart. It has a double-filter setup: the top helps cool the beans and lift out chaff, and the bottom catches the silver skins.
It can handle larger batches, up to about 500g (about 1 lb). So you’re not stuck cooling in tiny rounds like you’re rationing beans.
One thing I enjoy is that it runs on low voltage (12V). This feels safer than some random high-voltage DIY setup, especially if you roast at home a lot.
Is it perfect? Not really. The fan can be loud, and a few people mentioned the fan blades rubbing inside (fixable, but still annoying). And you might not get 100% of the chaff every single time. But overall, if you roast at home and want better flavor with less mess, this bean cooler turns everything easier.
4 – High-Quality Coffee Bean Storage Containers
A good storage container isn’t optional when you roast at home. It’s the part nobody gets excited about… until you mess it up once and your beans go flat for no reason.
Because here’s the annoying truth: fresh roasted coffee is fragile. It smells incredible on day one, then oxygen starts slowly stealing the life out of it. The flavor dulls, the aroma disappears, and suddenly your beans taste like cardboard.
When you roast your own beans, you’re putting in effort: timing first crack, managing airflow, cooling fast, trying not to go oily. So letting your beans slowly oxidize on the counter is kind of heartbreaking.
A high-quality coffee bean storage container protects your beans from the biggest enemies: oxygen, humidity, and light. And if you’re roasting bigger batches (or just like having a few different origins on rotation), storage is what keeps everything tasting “alive” instead of stale.
What do I recommend?
If you want a quality container, I suggest the AirScape Planetary Design Kilo Coffee Storage Canister.
The patented inner plunger lid literally pushes excess oxygen out through a two-way valve, then locks things down. So instead of trapping stale air inside with your beans (which is what most containers do), it actively removes it.
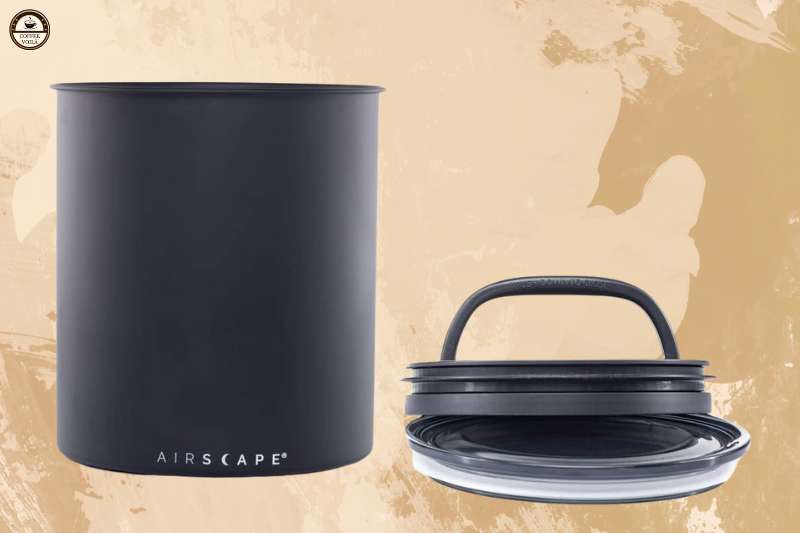
And the size is perfect if you roast at home. The AirScape Kilo holds up to 2.2 lbs of coffee beans. In other words, you can store a big fresh batch without playing coffee-bean Tetris every time you open the lid. It’s also a solid, stainless steel canister, so it blocks UV light too, which matters more than people think.
The only small downside? That lid can take a bit of force to push and pull. Some people love that because it feels secure. Others (especially if you’ve got smaller hands) might find it a little stubborn.
But if you roast at home and want your beans to stay fresh long enough to enjoy them, this is an upgrade worth having.
5 – Reliable Coffee Roasting Thermometer
A thermometer sounds optional… until you roast a batch that looks perfect and still tastes hollow. Roasting moves fast, and temperature is what keeps you grounded when everything starts happening at once.
And if you’re doing back-to-back batches, or you’re experimenting with a new bean, having a reliable coffee roasting thermometer makes it way easier to repeat results.
Not “I think it was medium-ish,” but “I hit this temp at this time, and it tasted sweet and chocolatey.” That kind of repeatable. So, a thermometer helps you avoid that “hope and pray” style of roasting.
What do I recommend?
If you want something simple, reliable, and not dependent on apps or Bluetooth, you should get the ThermoPro TP20 Thermometer.
Yeah, it’s technically made for BBQ. But honestly? It’s great for roasting too, especially when you don’t want to stand there babysitting the whole time.
The best part is that it’s wireless, with a strong signal (up to 500ft), because it uses radio frequency instead of Bluetooth. So you can walk around your kitchen, prep, or clean up while still keeping an eye on your roast temps.
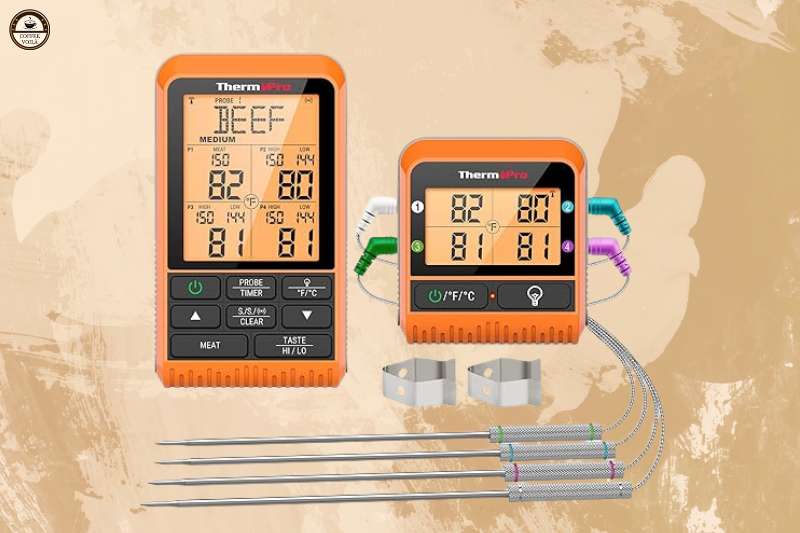
It also comes with dual probes. You can monitor two points at once, like your roasting environment + another spot, without constantly moving things around.
And the display is easy. No syncing. No downloading an app. Just batteries in, probes in, done. It even has alarms and a built-in timer. Which sounds small, but it saves you from that classic moment where you get distracted for 30 seconds and your roast jumps from “perfect” to “why is it smoking?”
One quick heads-up though: some people notice the probes can read a few degrees different from each other, and the low battery warning isn’t always obvious. So… maybe don’t start a roast on your last dying batteries.
Overall, it’s one of those tools that makes roasting feel calmer and more controlled. And that’s kind of the whole goal.
6 – Timer for Roasting
A timer keeps you grounded. It helps you track the important moments (drying, browning, first crack, development), and it makes it way easier to repeat a roast you actually loved.
Because honestly… “just 30 seconds longer” can be the difference between sweet and chocolatey vs. bitter and flat.
What do I recommend?
I recommend the OXO Good Grips Digital Triple Kitchen Timer. And yes, triple. Because roasting coffee rarely happens in a vacuum. You’re timing the roast… and the cooling… maybe you’re preheating something… or trying to remember when you started that kettle. It’s a lot of moving parts for a hobby that’s supposed to be relaxing.
This one gives you three separate 100-hour timers on one screen. Each has its own beep pattern (timer one beeps once, timer two beeps twice, timer three beeps three times). It sounds small, but when you’ve got multiple alarms going off, it’s nice to know which one you need to deal with.

The screen is big, the backlight is easy on the eyes, and the keypad makes setting time fast. No annoying “tap tap tap tap tap” button mashing. You just type it in like a normal person.
Also, I love that when a timer finishes, it keeps counting up afterward. So if you get distracted for a second (or five minutes…), you can look back and go, “Oh. Cool. I’m late.” Useful information.
Only downside? It doesn’t really have a true “off” switch, which bugs some people. But for roasting, it works without needing much attention. Perfect when you’re already trying to keep beans from turning into charcoal.
7 – Cleaning Tools and Maintenance Kits
Cleaning tools keep your home roasting setup from turning into a dusty, oily mess over time. Because chaff gets everywhere, oils build up faster than you expect. If you don’t stay on top of it, your gear starts to smell… off.
And the annoying part is that it’s not always obvious right away. You’ll roast a batch, brew it, and something feels flat or stale… and you’re sitting there blaming the beans when it’s really your equipment begging for a quick scrub.
What do I recommend?
I recommend the OXO Good Grips Water Bottle Cleaning Set. It’s not a “coffee tool” on paper, but it works ridiculously well for coffee gear, especially the stuff that’s annoying to clean properly.
You get three tools: a long bottle brush (perfect for narrow containers), a straw brush (great for little tubes and tight spaces), and a detail cleaner for cap threads and tiny crevices.
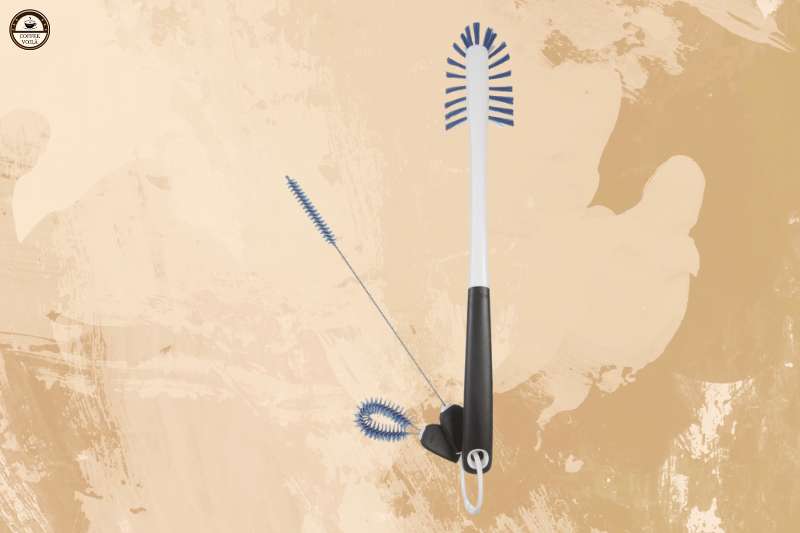
The long brush is the real hero. It reaches deep into bottles and thermoses without you smashing your knuckles like you’re fighting the container. The bristles are firm enough to clean, but soft enough that you don’t feel like you’re sanding your gear down.
And the best part? They all snap onto one ring, so you’re not losing pieces in a drawer. It’s simple and cheap, which is exactly what you want for the boring part of roasting.
8 – Smoke Suppression System for Indoor Roasting
If you’ve never roasted coffee indoors before, here’s the honest truth: roasting smoke is real. I mean that sharp, toasty, slightly burnt-popcorn kind of smoke that sneaks into your clothes, your kitchen, and somehow the whole house. And it doesn’t always hit right away, either.
Sometimes you’re feeling proud because the beans are browning nicely, and then suddenly you realize the air is getting… spicy. Sure, you can roast near a window. You can crank the extractor fan. You can do the whole “it’s fine” routine.
But if you roast indoors often (or you’ve got sensitive neighbors), a smoke suppression system makes the whole hobby way less stressful. You get to focus on the fun parts: listening for first crack, watching the color shift, smelling that grassy-to-caramel change. Instead of panicking like you just set something on fire.
What do I recommend?
I recommend the Smoke Buddy Personal Air Filter. It’s one of those products that looks almost too simple… and then you use it and realize it works.
You blow the smoke into it, and basically nothing comes out the other end. No setup, no power, no app. Just a handheld filter that traps smoke and odor (especially when it’s new).

I also love that it’s portable. So it works well in small spaces such as apartments, offices, even cars or travel setups. Not fancy, or perfect. But if you roast indoors and want fewer problems, it’s a surprisingly solid little fix.
9 – Heat-Resistant Roasting Gloves (New Add-On)
This one sounds a little extra… but roasting coffee can get sketchy fast. You’re standing there listening for the first crack, smelling that warm, toasted bread… and then you realize you need to grab something that’s way hotter than you expected.
A roasting chamber. A metal bowl. A tray. Something you thought would be “fine for a second.”
Well, coffee roasting isn’t the same as baking cookies, where you can simply use a towel. It’s heat + smoke + chaff + fast decisions. And if you’re dumping beans into a cooler or stirring them quickly, gloves make the whole process feel safer.
What do I recommend?
I suggest a pair of full neoprene BBQ gloves (the long 14-inch ones). They’re heat resistant up to 932°F, waterproof, and they have a grippy textured palm so you can handle hot stuff without that awkward “please don’t drop it” panic.
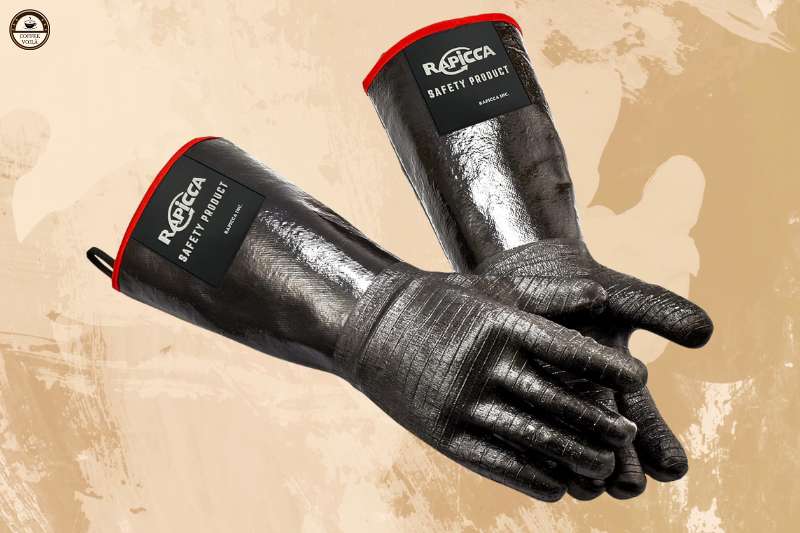
They’re also easy to clean. You only need soap and water, hang them up, and you’re done. And the long sleeve actually matters. Protecting your forearm when you’re reaching around hot equipment is one of those things you don’t appreciate until you really do.
They’re a bit bulky. So don’t expect perfect finger dexterity. But for home roasting, they’re exactly what you want: simple protection that lets you focus on the roast, not the burn risk.
What Coffee Roasting Accessories Should You Get First?
So yeah. If you’re wondering what coffee roasting accessories you should get first, don’t overthink it. You don’t need a full lab setup. You simply need the pieces that keep your roasts repeatable, safe, and not stressful.
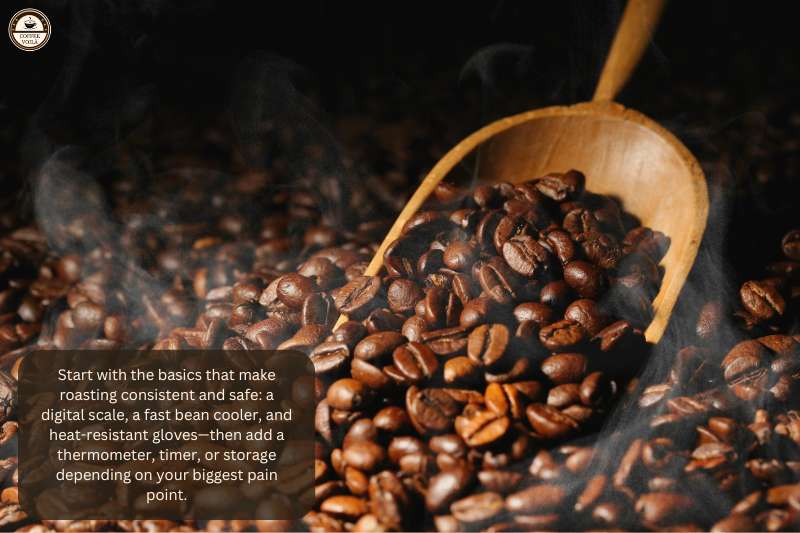
1) A digital scale (this is non-negotiable)
This is the boring answer, but it’s the correct one. A good scale is what makes your roasting feel “real” instead of random. Because once you start weighing your green beans (and your roasted beans after). You can track what happened, spot patterns, and stop guessing.
The TIMEMORE Black Mirror Basic 2 is a great pick here because it’s fast, accurate (0.1g), and it has that built-in timer.
2) A proper cooling setup (because your beans keep roasting)
The roast doesn’t end when the heat stops. The beans still hold heat and keep developing. That’s why a bean cooler like the DYVEE Coffee Bean Cooler is such a game-changer. It’s basically instant relief.
You dump the beans in, the fan goes wild, the chaff gets pulled away. It cools fast (often 1–2 minutes) and it keeps your results cleaner and more consistent.
3) Heat-resistant gloves (because you only need to learn this once)
You know those moments where you think something won’t be that hot… and then you touch it and immediately regret being alive? Yeah.
Roasting has a lot of “grab this quickly” moments. A pair of long neoprene gloves (the kind that handle heat up to around 932°F) makes the whole thing calmer. Plus, they’re easy to wash, which matters because roasting leaves behind smoke, oils, and that “coffee aftermath.”
What should you buy next (after the basics)?
Once you’ve got those three, your next upgrade depends on what’s annoying you most:
- If your roasts feel inconsistent → get a thermometer (ThermoPro TP20 is great because it’s wireless and you can monitor from a distance)
- If your timing is all over the place → grab a real timer (the OXO triple timer)
- If your beans go stale fast → get a storage AirScape Kilo canister (it pushes out air, not just “seals” it)
Last Thoughts (My Quick Rule)
My quick rule is simple: buy what makes your roasting safer and more repeatable first. Not what looks coolest on your counter. Before you check out, ask yourself these quick questions:
- Do I want consistency or just “fun experiments”? (If consistency: scale + timer.)
- Am I roasting inside? (If yes: smoke control + good ventilation matters.)
- Do my beans stay hot too long after roasting? (If yes: get a proper cooler.)
- Am I burning my fingers or juggling hot parts? (If yes: gloves. Immediately.)
- Do my beans taste flat after a few days? (If yes: better storage.)
Start small, upgrade as you feel the pain points, and you’ll build a setup that fits your roasting style without wasting money on stuff you don’t need yet. Still need help? Leave a comment below and I’ll help you out.


