
How To Make a Piccolo Coffee At Home (Step-By-Step Guide)
Last updated on February 16th, 2026 at 05:00 pm
Have you ever wondered how to recreate that perfect piccolo coffee you had at your favorite café?
I remember my first experience at Starbucks, ordering a piccolo out of curiosity. The small size and the rich, creamy flavor of the ristretto shot mixed with steamed milk completely won me over.
That first sip was a revelation, and I knew I had to bring this experience home.
If you’ve felt that same excitement and want to learn how to make a piccolo coffee yourself, you’re in the right place.
Plus, making a piccolo at home is simpler than you might think, and with a bit of practice, you can enjoy a café-quality coffee every day. So, follow this step-by-step guide, and let’s start brewing!
Are you a true coffee lover? Challenge your taste buds with ‘31 Coffee Types You Must Know’ – Start exploring today!
What Is a Piccolo?
A piccolo coffee is a small yet flavorful drink, perfect for anyone who loves the taste of espresso but prefers a touch of milk. It consists of a single shot of ristretto and a small amount of steamed milk, typically served in a 3-4 ounce glass.
Ristretto is a short, concentrated espresso shot made with less water, resulting in a richer and slightly sweeter flavor.

The combination of ristretto and steamed milk creates a rich, creamy coffee with a strong espresso flavor, balanced by the smoothness of the milk.
This makes the piccolo a popular choice for those who enjoy a quick, satisfying coffee experience without the volume of a larger drink.
Is a Piccolo the Same as a Cortado, Latte, or Macchiato?
It’s easy to confuse these coffee drinks since they all involve espresso and milk, but they have distinct differences:
Piccolo vs. Cortado
- Piccolo: Single shot of espresso with steamed milk in a 3-4 ounce glass. The ratio of espresso to milk is about 1:2.
- Cortado: Equal parts espresso and steamed milk, usually served in a slightly larger glass, typically 4 ounces. The milk in a cortado is often less frothy.
Piccolo vs. Latte
- Piccolo: Smaller size with a more robust espresso flavor because of the lower amount of milk.
- Latte: This is much larger, often 8-12 ounces or more, and has a higher milk-to-espresso ratio. Also, lattes are creamier and milder in coffee flavor.
Piccolo vs. Macchiato
- Piccolo: Contains more milk, providing a smoother taste.
- Macchiato: A shot of espresso “stained” with just a small amount of steamed milk or foam, resulting in a much stronger coffee flavor.
Each of these drinks offers something unique. If you’re like me and enjoy a balanced coffee experience that’s not too milky but not too strong, a piccolo might just be your new favorite.

Mastering the Piccolo: Step-By-Step Guide
Equipment
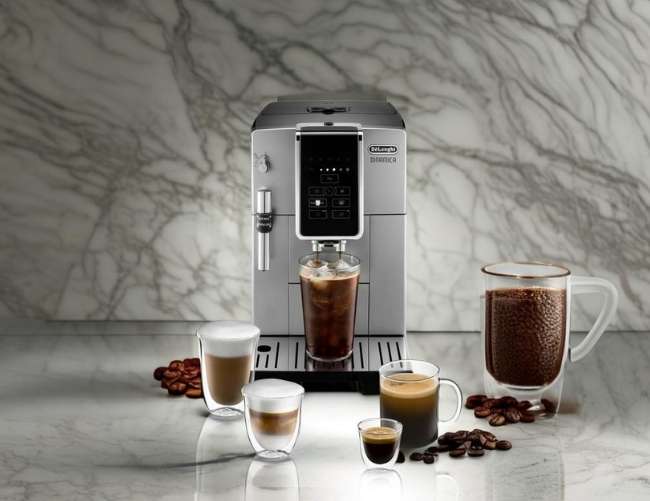
- Espresso Machine: A quality espresso machine is essential for making a good piccolo. Look for one with a steam wand for frothing milk.
- Coffee Grinder: Freshly ground coffee makes a big difference. A burr grinder is recommended for consistent grind size.
- Milk frother or Steam Wand: You'll need a steam wand to get that perfect microfoam. If your machine doesn't have one, a standalone milk frother works, too.
- Small Glass or Cup: Piccolos are traditionally served in a 3-4 ounce glass. A demitasse cup also works well.
Ingredients
- Espresso Beans: I love using beans from Lavazza. Their Super Crema blend is known for its rich, smooth flavor and perfect balance of sweetness and bitterness. Opt for a medium to dark roast for a robust taste.
- Fresh Milk: Whole milk is best for creating a creamy texture, but you can also use alternatives like oat milk or almond milk.
Instructions
- Grind the Coffee Beans: Start by grinding your Lavazza espresso beans to a fine consistency. Freshly ground beans are key to a flavorful ristretto shot.
- Prepare the Ristretto: Load the ground coffee into your machine's portafilter. Tamp it down evenly and firmly. Then, pull a single shot of ristretto (about 0.5-0.75 ounces). This should take around 15-20 seconds. The result should be a rich, aromatic shot with a layer of crema on top.
- Steam the Milk: Pour 2-3 ounces of milk into a small pitcher. Use the steam wand to froth the milk, aiming for a velvety microfoam. Submerge the tip of the wand just below the surface of the milk and gradually lower the pitcher as the milk expands. The milk should be around 150-160°F (65-70°C).
- Combine Ristretto and Milk: Gently pour the steamed milk over the ristretto shot, filling your 3-4 ounce glass or cup. You want a good balance of liquid milk and froth.
- Serve and Enjoy: Your piccolo is now ready to enjoy! Take a moment to appreciate the rich aroma before taking that first satisfying sip.
Video
Notes
Pro Tips
- Experiment with Milk Types: While whole milk is traditional, experimenting with different milk types can offer new flavors and textures.
- Adjust the Ratio: Feel free to tweak the ristretto-to-milk ratio to suit your taste. Some prefer a stronger coffee flavor, while others like a creamier texture.
- Practice Makes Perfect: The key to a great piccolo is practice. Don’t be discouraged if it’s not perfect the first time. Keep experimenting with grind size, milk frothing, and ristretto extraction.
Want better espresso at home? At reliable machine makes all the difference.
12 Best Home Espresso Machines (2026)
From beginner models to prosumer setups, we highlight:
Best overall, budget, automatic, and café-quality picks
Origins of the Piccolo
While the name “piccolo” is Italian, the piccolo coffee has its roots in Australia. This enjoyable coffee drink appeared from the bustling coffee culture of cities like Melbourne and Sydney.
Both cities claim to be the birthplace of the piccolo, and baristas from each have strong opinions on where it originated.
The Australian Connection
The story goes that baristas in Melbourne and Sydney created the piccolo to taste their espresso roasts without drinking full-sized lattes all day.

The piccolo provided a smaller, easier way to sample coffee with milk, helping baristas check the quality of their espresso throughout the day.
Growing Popularity
Although it began in Australia, the piccolo has gained international popularity. Many coffee shops in major cities like New York and London now offer this small but flavorful coffee option on their menus.
Also, its unique blend of strong coffee and smooth milk appeals to coffee lovers looking for a quick but satisfying drink.
Popular Piccolo Variations
I enjoy experimenting with different variations, and here are three popular ones you can try at home: the Macchiato, the Cortado, and the Gibraltar.
1 – Macchiato
A macchiato is a simple yet bold coffee variation. The term “macchiato” means “stained” or “spotted” in Italian, which perfectly describes this drink. It consists of a shot of espresso “stained” with a small amount of steamed milk or milk foam.

How to Make a Macchiato:
- Prepare the Espresso: Pull a single shot of espresso.
- Add Milk: Add a dollop of steamed milk or a small spoonful of milk foam on top of the espresso.
This creates a strong, concentrated coffee with just a touch of milk to mellow the intensity, making it a great choice for those who enjoy a robust coffee flavor.
2 – Cortado
A cortado is a balanced coffee drink that combines equal parts of espresso and steamed milk. The name “cortado” means “cut” in Spanish, indicating that the milk cuts through the espresso, creating a smooth and balanced drink.

How to Make a Cortado:
- Prepare the Espresso: Pull a single shot of espresso.
- Steam the Milk: Steam an equal amount of milk, aiming for a smooth, velvety texture.
- Combine: Pour the steamed milk over the espresso in a 1:1 ratio.
The result is a creamy, smooth coffee that perfectly balances the strong espresso with the sweetness of steamed milk.
3 – Gibraltar
The Gibraltar is similar to a cortado but is traditionally served in a Gibraltar glass, which holds about 4.5 ounces. This variation was popularized in San Francisco and has grown in popularity ever since.

How to Make a Gibraltar:
- Prepare the Espresso: Pull a double shot of espresso.
- Steam the Milk: Steam about 2-3 ounces of milk, creating a smooth microfoam.
- Combine: Pour the steamed milk over the double shot of espresso in a Gibraltar glass.
This drink offers a robust coffee flavor with a creamy finish, making it a favorite for those who want a slightly larger, richer coffee experience.
Favorite Ways To Personalize Your Piccolo
Making a piccolo coffee at home allows for endless customization. Here are three unique ways to personalize your piccolo:
1 – Spice Infusion
Adding a touch of spice can bring your piccolo to new heights. My favorite way to do this is by infusing the milk with spices.

How to Spice Up Your Piccolo:
- Choose Your Spices: I love using cinnamon, nutmeg, and a hint of cardamom. You can also try vanilla or star anise for a different twist.
- Infuse the Milk: Heat your milk gently in a saucepan with the spices before steaming. Then, let it simmer for a few minutes to infuse the flavors.
- Steam and Froth: After infusing, steam the milk as usual. The result is a beautifully spiced milk that adds warmth and complexity to your piccolo.
2 – Honey-Lavender Syrup
I often make a honey-lavender syrup to mix into my piccolo for a touch of sweetness and a hint of floral aroma.

How to Make Honey-Lavender Syrup:
- Prepare the Syrup: Combine 1/2 cup of honey, 1/2 cup of water, and 1 tablespoon of dried lavender flowers in a saucepan. Bring to a simmer and stir until the honey is dissolved.
- Strain and Cool: Strain out the lavender flowers and let the syrup cool.
- Add to Your Piccolo: Stir a teaspoon of the syrup into your ristretto shot before adding the steamed milk. This adds a delightful, aromatic sweetness to your coffee.
3 – Coconut Milk Twist
I sometimes use coconut milk instead of regular milk for a tropical flavor. This not only adds a unique flavor but also makes the drink dairy-free.

How to Make a Coconut Milk Piccolo:
- Choose Your Coconut Milk: Opt for high-quality, unsweetened coconut milk.
- Steam the Milk: Steam the coconut milk just as you would regular milk, aiming for a creamy, frothy consistency.
- Combine with Ristretto: Pour the steamed coconut milk over your ristretto shot. The rich, slightly sweet coconut flavor pairs wonderfully with the bold coffee.
So, whether you prefer the warmth of spices, the sweetness of honey-lavender syrup, or the tropical twist of coconut milk, you can customize piccolo in whatever way you like.
Common Pitfalls and How to Sidestep Them
Even with practice, making a perfect piccolo can have a few hiccups. I encountered three issues while learning to make a piccolo. Here’s how you can avoid them:
1 – Overheating the Milk
One of my early mistakes was overheating the milk. When milk gets too hot, it can scorch, resulting in a burnt taste that overpowers the delicate flavors of the coffee.
How to Avoid It:
- Monitor Temperature: Use a milk thermometer to keep an eye on the temperature. Aim for 150-160°F (65-70°C).
- Watch for Signs: If you don’t have a thermometer, stop steaming when the pitcher becomes too hot to touch for more than a few seconds.
- Practice Patience: Don’t rush the steaming process. Slowly heat the milk to ensure a creamy, smooth texture without burning it.
2 – Incorrect Ristretto Extraction
Getting the ristretto shot just right can be tricky. I struggled with either under-extracting or over-extracting, which affected the flavor balance.
How to Avoid It:
- Dial In Your Grind: Use a finer grind for ristretto shots compared to regular espresso. The finer grind slows the water flow, allowing for a more concentrated extraction.
- Perfect the Timing: A ristretto shot that takes about 15-20 seconds to extract. If it’s too fast, the grind might be too coarse; if it’s too slow, it could be too fine.
- Consistency is Key: Practice until you consistently get the right balance. Small adjustments to grind size and tamping pressure can make a big difference.
3 – Not Balancing Milk and Espresso
Early on, I often ended up with a piccolo that was either too milky or too strong because I didn’t balance the milk and espresso properly.
How to Avoid It:
- Measure Precisely: Use a small kitchen scale to measure your milk and espresso shots. You want about 2-3 ounces of steamed milk for every 0.5-0.75 ounce of ristretto.
- Adjust to Taste: Everyone’s preference is different. Start with the standard ratio and adjust based on your taste. Too strong? Add a bit more milk. Too milky? Use less milk or a stronger ristretto.
- Practice Makes Perfect: It might take a few tries to get it just right. Keep tweaking and tasting until you find the perfect balance for your piccolo.
You can greatly improve your piccolo by being mindful of these common pitfalls and how to sidestep them. So, don’t forget to apply this advice.
Last Thoughts
We’ve spoken about everything from the basics of a piccolo, its Australian origins, and the tools and ingredients you’ll need.
By following our step-by-step guide, experimenting with popular variations like the Macchiato, Cortado, and Gibraltar, and adding personal touches such as spice infusions or honey-lavender syrup, you can enjoy a café-quality coffee right in your kitchen.
Also, remember to watch out for common pitfalls like overheating the milk or incorrect ristretto extraction to ensure your piccolo is perfect every time.
I’d love to hear about your experiences with making piccolo coffee. So, share your tips, tricks, or challenges in the comments below! And like always, “voilà!”
Questions? We Have Answers.
Get answers to a list of the most Frequently Asked Questions.


Nice article.clear and interesting description of piccolo coffee