How to Use a Drip Coffee Maker (Easy Step-By-Step Guide)
Last updated on May 27th, 2025 at 01:41 pm
Did you know that drip coffee makers have been brewing our morning coffee for nearly a century? With origins dating back to the mid-1900s.
These reliable machines have gone through incredible transformations, from manual pour-overs to automatic drip brewers, bringing café-style coffee right to our kitchen counters.
But if you’re like many coffee lovers, you might wonder, “What’s the real secret to getting the perfect cup from my drip coffee maker?”
In this guide, you’ll discover everything you need to know about mastering drip coffee. From understanding how drip brewing works and its history to each part’s role, plus pro tips for brewing and maintaining your machine. So let’s start brewing
What Is The Drip Coffee Method?
It’s simple, classic, and perfect for those who want a straightforward way to make a flavorful cup of coffee. At its core, drip coffee is all about gravity doing the work.
Ground coffee sits in a filter, hot water pours over it, and the coffee slowly drips into a carafe. This process brings out a balanced and rich taste without needing to fuss over the brewing time or pressure, like with espresso or French press methods.
Drip vs. The Rest
How does drip coffee compare to other methods? Here’s a quick breakdown:
- Espresso: Uses high pressure to extract bold and intense flavors. But drip coffee takes a gentler approach. This results in a smoother, balanced taste without the sometimes bitter punch that espresso lovers enjoy.
- French Press: In a French press, coffee grounds steep directly in water, creating a heavier-bodied, more textured brew with more oils and fine particles. However, drip coffee uses a paper filter to deliver a cleaner and grit-free cup.
If you enjoy balanced, easy-to-sip coffee, drip coffee could be your best friend.
Brief History About Drip Coffee Maker
It all began in 1908 in Germany with Melitta Bentz, who invented the first paper coffee filter after being frustrated with coffee grounds sneaking into her cup.

She created a cleaner brew that quickly gained popularity using blotting paper and a punched-out can. This simple and effective invention laid the foundation for drip brewing as we know it.
In 1944, Willy Brand in Switzerland introduced a circular paper filter and an automatic drip mechanism, making brewing even more convenient. By 1954, the drip coffee maker took another leap forward with the Wigomat, designed by Gottlob Widmann.

The Wigomat used electricity to control the brewing process. This gave people a hands-free experience that revolutionized coffee brewing in homes.
By the 1970s, electric drip brewers had mostly replaced percolators, which often led to bitter coffee. People embraced drip coffee makers for their ease, consistency, and smooth flavor.
Today’s models—ranging from basic to programmable—are a tribute to the early inventions that simplified and improved the coffee brewing experience.
Exploring Drip Coffee Maker Parts and Functions
Each part plays a specific role, so knowing them helps you solve problems and get better brews. So, let’s quickly talk about this:

| Parts | Description |
|---|---|
| Water Reservoir | This is where you pour in the water before brewing. The reservoir feeds water to the rest of the machine. For this reason, filling it to the right level is key to getting your ideal coffee strength. |
| Showerhead | Located above the coffee grounds. The showerhead distributes hot water evenly over them. This is what helps saturate the grounds uniformly. |
| Filter Basket | The basket holds your coffee grounds and filter (either paper or reusable). It sits directly below the showerhead, allowing hot water to pass through the grounds before dripping down into the pot. |
| Carafe or Coffee Pot | This is where the brewed coffee collects and stays warm. Many drip coffee makers have a hot plate below the carafe to keep your coffee at an ideal temperature. However, glass carafes can sometimes overheat. So some people prefer thermal carafes to maintain flavor. |
| Hot Plate (for glass carafes) | Located beneath the carafe, the hot plate keeps your coffee warm after brewing. This is handy if you’re not pouring immediately, but leaving coffee on a hot plate too long can make it taste bitter. |
| Control Panel or Switch | Depending on the model, this can range from a simple on/off switch to a programmable control panel. Some machines allow you to set a timer for brewing, adjust brew strength, or turn off the hot plate after a set time. |
| Heating Element | This part heats the water to the optimal brewing temperature. Positioned near the machine’s base, it keeps the water hot enough (around 195-205°F) to extract all those rich coffee flavors. |
How Do You Use a Drip Coffee Maker For The First Time?
Here are some simple steps that’ll get you brewing like a pro in no time.
Step 1) Rinse the Carafe and Brew Basket
Start by giving your carafe and brew basket a quick rinse. Even though they’re brand new, rinsing removes any dust or residue from the packaging. Also, it helps you get familiar with where everything goes.
Step 2) Add Water to the Reservoir
Next, fill the reservoir with fresh and cold water. Most coffee makers have measurement lines inside the reservoir. For this reason, just match the amount to the number of cups you want. And be careful not to overfill—many coffee makers tend to spill over if you go past the max line.
Step 3) Insert a Filter
Now, place a paper or reusable filter into the brew basket. Paper filters will give you a cleaner cup, while reusable filters save you money over time. Just make sure the filter sits snugly so no coffee grounds sneak out during brewing.
Step 4) Add Coffee Grounds
For your first brew, try a coffee-to-water ratio of 1 to 2 tablespoons of coffee per cup of water, depending on your taste. Measure out the grounds and pour them into the filter. If you like a stronger brew, go for the higher end of that range.
Step 5) Secure the Brew Basket and Carafe
Once the grounds are in, close the brew basket and ensure the carafe is properly aligned. This prevents any drips or spills and makes sure the brewed coffee goes where it’s supposed to – right into the pot!
Step 6) Power On and Start Brewing
Now it’s go-time. Turn on your coffee maker by pressing the brew button or flipping the switch. Depending on the model, you might have extra settings for brew strength or a timer. But for your first time, a basic brew is perfect.
Step 7) Wait for the Brew Cycle to Finish
It only takes about 5-10 minutes for a full pot to brew, depending on your coffee maker. The machine will usually make a faint sizzling sound as the water passes through the grounds, and some models even let you grab a quick cup mid-brew.
Step 8) Pour and Enjoy
Once the brewing stops, pour yourself a cup, breathe in that rich aroma, and savor your first homemade drip coffee. If you’re planning to leave the pot on the hot plate, just remember that coffee left too long can turn bitter.
Tips and Tricks for Drip Coffee
A few tweaks here and there can go a long way. After trying a bunch of methods, these three simple tricks have improved my coffee.

1 – Pre-Wet the Filter
Pre-wetting the filter makes a surprising difference. By pouring hot water over the paper filter before brewing, you can get rid of any papery taste and let the coffee’s natural flavors shine. Just place the filter, rinse it, and dump the water before adding your coffee grounds – it’s quick but worth it.
2 – Dial in Your Coffee-to-Water Ratio
Finding your ideal coffee-to-water ratio is key. Start with about 1 to 1.5 tablespoons of coffee per 6 ounces of water, then adjust based on your taste. A scale helps make this super precise, so you can find that perfect balance of flavor intensity that works best for you.
3 – Use Bloom Time
Want a richer flavor? Try “blooming” your coffee. Add a bit of hot water to the grounds before brewing and let it sit for 30 seconds. The grounds will “bloom,” releasing gases and deepening the flavor. Then, let your coffee maker handle the rest.
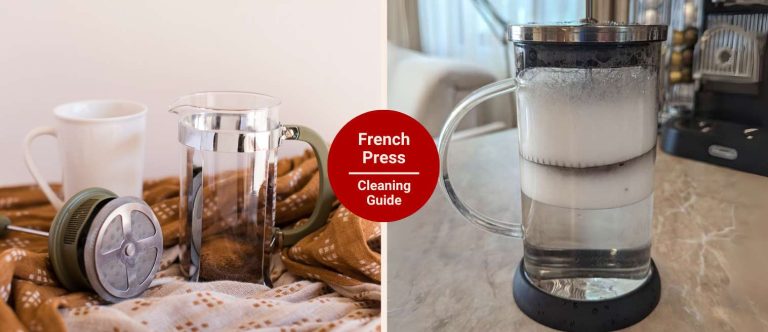
How To Maintain And Clean Your Drip Coffee Maker?
Over time, mineral deposits and old coffee oils can build up. This causes a stale taste and a less efficient brew. So, here’s a step-by-step guide I use to keep my machine running well:
| Maintenance Step | Maintenance Step |
|---|---|
| Daily Rinse | Rinse the carafe and filter basket with warm water after each brew to prevent stains and residue buildup. |
| Weekly Deep Clean | Wash all removable parts, including the carafe, filter basket, and reusable filter, in warm, soapy water to prevent oil buildup and keep flavor fresh. |
| Monthly Descaling | Run a cycle with a 50/50 water and vinegar solution through the machine to remove mineral deposits. Follow with two cycles of clean water. |
| Scrub the Water Reservoir | Wipe the water reservoir every few months with a cloth or brush to prevent mold and mineral deposits. |
| Check the Filter Regularly | Inspect permanent filters for wear and clean them periodically with soapy water. Replace as needed for optimal performance. |
| Final Wipe Down | Wipe the machine’s exterior with a damp cloth to keep it clean and free of stray coffee grounds or spills. |
Common Issues with Drip Coffee Makers
When you’re using your drip coffee maker daily, certain issues tend to pop up. Here are three of the most important problems I’ve run into and how I fixed them:

1 – Slow Brewing Time
A sluggish brew usually means mineral buildup in the machine is slowing down the water flow. I find that running a descaling solution, or even just a vinegar-water mix, through the coffee maker every month keeps things running smoothly. If you have hard water, make this a monthly routine to avoid slow brews.
2 – Weak or Watery Coffee
Nothing’s worse than a weak cup when you need a caffeine kick. This is often caused by too coarse a grind or water that isn’t reaching the ideal temperature of 195–205°F.
Adjusting to a medium grind or adding a bit more coffee usually does the trick for a richer taste. Cleaning your machine can also help it reach optimal brewing temps.
3 – Coffee Grounds Overflowing in the Filter
I learned the hard way that overfilling the coffee filter or using too fine a grind can cause a mess.
Now, I use a medium grind and measure my grounds carefully to prevent overflow. This keeps the coffee flowing nicely and saves a lot of cleanup!
Last Thoughts
So there you have it—a complete guide to mastering your drip coffee maker! I’d love to hear your tips, too! Got a favorite trick or an issue I missed? Go below and leave a comment and with that voilà!
Questions? We Have Answers.
Get answers to a list of the most Frequently Asked Questions.