How to Use a Keurig Machine (Easy 4-Step Guide)
Last updated on May 27th, 2025 at 03:53 pm
Ever bought a new coffee machine, only to realize you have no idea how to use it? Yeah, same.
A few years ago, I bought a Keurig K-Elite, thinking I’d just unbox it, press a button, and boom coffee. Well, there’s a little more to it than that.
Not that the machine was complicated, but I still had to read the manual (ugh), and let’s be honest who actually enjoys reading manuals? I’d much rather be drinking coffee than flipping through tiny-print instructions.
After a few missteps (like forgetting to run a cleansing brew—big mistake), I finally got the hang of it. And now? I can’t imagine mornings without it.
If you just got a Keurig and want to skip the confusion, this guide is for you. I’ll walk you through setting up, brewing your first cup, and keeping your machine running smoothly without the boring manual. So let’s start brewing!
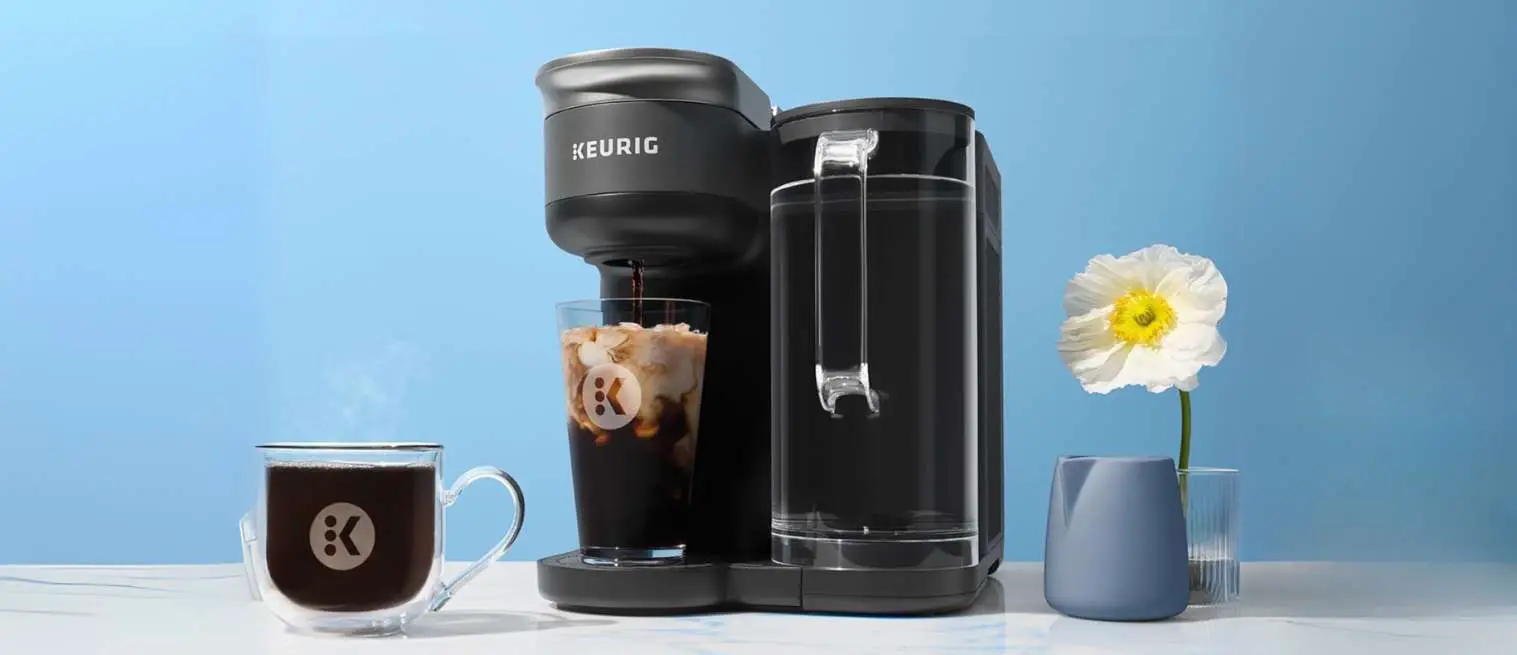
What Is a Keurig Machine?
The Keurig machine, a single-serve coffee maker, is designed for simplicity. It brews coffee using K-Cup pods, those little pre-packaged coffee pods that make mornings ridiculously easy.
Unlike traditional coffee makers that require scooping, measuring, and sometimes making a mess, Keurig machines do all the work for you.
Just pop in a pod, press a button, and boom, you’ve got coffee in under a minute. They’re perfect for busy mornings, offices, or anyone who just wants caffeine without the hassle.

Now, I won’t lie: if you’re used to espresso or freshly ground coffee, a Keurig won’t give you the same bold, rich flavor. But what it lacks in customization, it makes up for in convenience.
Plus, with hundreds of K-Cup flavors, including regular coffee, flavored blends, teas, hot cocoa, and even iced coffee, there’s something for everyone.
How Do Keurig Coffee Makers Work?
If you’ve never used a Keurig before, here’s the basic rundown:
- Pop in a K-Cup pod – Lift the lid, place the pod in the holder, and close it. This pierces the pod’s top and bottom so water can flow through.
- Pick your cup size – Most models let you choose between 6 oz, 8 oz, 10 oz, or 12 oz. The smaller the cup, the stronger the coffee.
- Press the brew button – The Keurig quickly heats the water and pumps it through the pod, brewing your coffee in less than a minute.
- Enjoy & toss the pod – Once the coffee is done, remove the used pod and throw it away (or recycle it, if possible).
Unlike espresso machines, which use high-pressure extraction (9+ bars) to pull a strong creamy shot, Keurig machines brew more like a drip coffee maker. In other words, the coffee is milder and smoother rather than super bold.
Examples of Popular Keurig Models
Keurig has tons of models, but here are three of the most popular ones:
1 – Keurig K-Slim – Best for Small Spaces
If counter space is tight, the Keurig K-Slim is a solid pick. It’s only 5 inches wide. For this reason, it fits just about anywhere. This machine is great for small kitchens, dorm rooms, or offices.

It still lets you brew 8, 10, or 12 oz cups and with its 46 oz water reservoir. So you won’t have to refill it constantly.
2 – Keurig K-Elite – Best for Stronger Coffee
If you like your coffee on the bolder side, the K-Elite has a Strong Brew button that extracts more flavor from your K-Cup.

It also has an Iced Coffee setting, which brews hot coffee at a lower temperature to avoid watering it down when you add ice. Plus, with a huge 75 oz water tank, you can brew multiple cups before needing a refill.
3 – Keurig K-Café – Best for Lattes & Cappuccinos
This one’s for anyone who loves milk-based drinks. The K-Café comes with a built-in milk frother. For this reason, you can whip up lattes and cappuccinos at home.

While it doesn’t make true espresso (since Keurig doesn’t use high pressure), it does have a “Shot” button, which brews a stronger, more concentrated coffee for your milk-based drinks. If you want Keurig convenience with a little extra coffee shop flair, this is the one to get.
4 – Steps To Use Your Keurig Coffee Maker
Just got a Keurig coffee maker? Exciting! But before you start tossing in K-Cups and pressing buttons, there are a few things to set up, clean, and prep to make sure your first cup is actually good.
Whether you have a Keurig K-Elite, K-Slim, or K-Café, the process is pretty much the same. I suggest following these four simple steps:
Step 1 – Setting Up Your Keurig Machine
Unboxing & Initial Setup
First things first—get your Keurig out of the box and place it on a flat, dry surface (countertops are best). Plug it in, and if your model comes with a water filter, go ahead and install it according to the manual.
This little filter helps your coffee taste better and prevents mineral buildup in the machine.
Filling the Water Reservoir
Your Keurig won’t brew if there’s no water. So, fill up that water reservoir with filtered or bottled water (avoid distilled water; it messes with the sensors). Ensure it’s securely attached to prevent leaks, then you’re good to go.
Step 2 – Running a Cleansing Brew
Before brewing your first cup, you’ll want to run a cleansing brew. Because you don’t want your coffee to taste like factory dust.
- Place a large mug on the drip tray.
- Run a brew cycle with just water (no K-Cup).
- Dump the water and repeat if needed.
This flushes out any weird residue from the manufacturing process. So your coffee tastes fresh from the start.
Step 3 – Brewing Coffee with a Keurig Machine
Choosing a K-Cup
Now for the fun part: picking your coffee! Whether you like dark roasts, flavored coffee, or even tea, there’s a K-Cup for everyone. Just ensure the foil lid isn’t damaged or it won’t brew properly.
Inserting the K-Cup Pod
Lift the Keurig lid, pop the K-Cup into the holder, and close the lid firmly until you hear a click. That click means the machine has punctured the pod, so water can flow through.
Selecting Your Cup Size
Most Keurigs let you pick between 6 oz, 8 oz, 10 oz, and 12 oz. Here’s the deal: smaller cups = stronger coffee. If you want a bold taste, go for 6 or 8 ounces instead of 12 oz, which can taste a little weak.
Brewing Your Coffee
Now, just press the brew button and wait 30-60 seconds. Once the coffee is done, toss the used K-Cup (or recycle it if it’s a reusable one), and boom, your coffee’s ready.
Step 4 – Cleaning & Maintaining Your Keurig Machine
Keurigs aren’t high-maintenance, but a little cleaning goes a long way in keeping it running smoothly.
Daily Cleaning Tips
- Rinse the drip tray and water reservoir daily. The fact is coffee residue builds up fast.
- Wipe down the machine with a damp cloth to keep it looking fresh.
Descaling the Machine (Every 3-6 Months)
Over time, minerals from water can clog your machine, making it brew slower (or not at all). To prevent this, descale it every few months using Keurig Descaling Solution or a vinegar-water mix:
- Fill the water reservoir with descaling solution or vinegar and run a few brew cycles.
- Repeat with fresh water until there’s no vinegar taste left.
Replacing the Water Filter
If your Keurig has a charcoal water filter, swap it out every two months. This helps keep your coffee tasting fresh and reduces mineral buildup.
Troubleshooting Common Keurig Issues
Sometimes, these machines can be a little temperamental. I remember the first time my Keurig refused to brew. I pressed the button, and… nothing.
No coffee, no sound, just a blank stare from my machine. Well, it was a simple fix, but at that moment, I was convinced I’d broken it. So, if your Keurig is acting up, don’t panic. Usually, most issues have quick, easy fixes.

1 – Keurig Not Brewing?
If your Keurig isn’t brewing, the first thing to check is the water reservoir. If it’s not seated properly, the machine might not recognize that it has water. For this reason, try removing and reattaching it to ensure it’s locked in place.
Another common issue? Clogged needles. Your Keurig pierces the K-Cup to let water flow through. But over time, coffee grounds and residue can build up and block the needle.
The fix? Straighten out a paperclip, insert it into the needle holes, and wiggle it around to clear any gunk. Then run a water-only cycle afterward to flush out any leftover debris.
2 – Weak or Watery Coffee?
Ever brewed a cup and thought, This tastes like brown water? Yeah, I’ve been there. If your Keurig coffee is weak, here’s what to check.
First, use a smaller cup size, such as the 6 oz or 8 oz option, which will give you a stronger brew than the 10 oz or 12 oz settings, which dilutes the coffee more.
If you want bolder coffee, look for “Extra Bold” or “Strong” K-Cups, which contain more coffee grounds per pod.
Another reason for weak coffee? A dirty needle. If coffee isn’t extracting properly, the needle could be partially clogged, leading to under-extracted, watery coffee.
Use the paperclip trick to clean it out, then run a cleansing brew to ensure everything flows smoothly.
3 – Machine Not Turning On?
You press the power button and… nothing. No lights, no sounds—just a dead Keurig. Before assuming the worst, let’s check the basics.
First, make sure the power cord is plugged in securely. I know it’s obvious, but you’d be surprised how often this is the issue. I suggest trying to plug it into a different outlet to rule out any issues with the power source.
If that doesn’t work, unplug the Keurig for a few minutes, then plug it back in. Some models have internal resets that need a little time to reset before turning on again.
If it still won’t power up and you’ve checked the outlet, contact Keurig support. Sometimes, internal fuses blow, and they may be able to help.
Last Thoughts
Got a Keurig issue I didn’t cover? Drop your questions in the comments! I’d love to hear what’s going on with your machine and help you figure it out.
Or, if you have your own Keurig hacks or fixes, share them. I’m always up for learning new tricks!
Questions? We Have Answers.
Get answers to a list of the most Frequently Asked Questions.