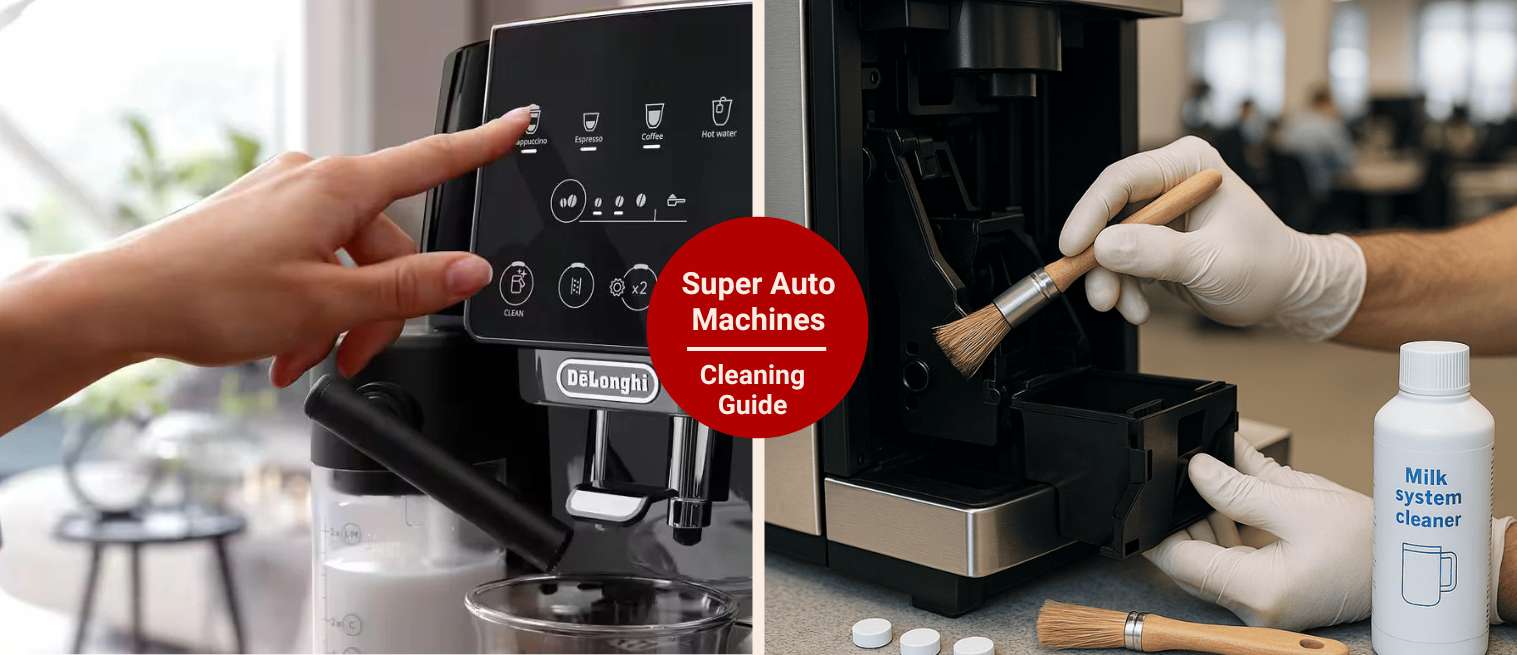
How to Clean a Super Automatic Espresso Machine?
Last updated on March 10th, 2026 at 03:12 pm
There’s something almost unfair about super automatics.
You press one button… a few seconds later there’s a cappuccino in your cup. That has thick foam and a warm, sweet smell. No tamping, nothing! It kind of feels like cheating, honestly.
And that’s the problem. Because when something feels that easy, you forget it needs attention too.
I learned that the slightly gross way. One night I made a late cappuccino and didn’t run the milk rinse. “I’ll do it tomorrow,” I thought. The next morning I pressed the button again, expecting magic and instead got thin foam and a faint sour smell.
Not terrible but not right. I popped open the milk container and… yeah. Let’s say warm milk sitting in tiny tubes overnight is not your friend.
That’s when it clicks.
Super automatics feel effortless. So we treat them like appliances instead of coffee machines. But inside, coffee oils are building up. Milk residue is hardening. Scale is slowly forming where you can’t even see it. And the machine won’t always scream about it right away. It just starts tasting “off.”
If you’ve ever wondered whether you need to clean a super automatic espresso machine as often as manufacturers suggest, the short answer is yes. Not obsessively but consistently.
In this guide, you’ll learn what needs cleaning (daily, weekly, and monthly) and what happens if you skip it. Nothing complicated. Just the routines that keep your espresso tasting as it should.
Why Cleaning Your Super Automatic Matters?
I used to think cleaning my super automatic espresso machine was mostly about hygiene. You know, keeping things neat, avoiding bad smells, and being a responsible adult.
But it’s really about taste, performance, and honestly… preventing small problems from turning into expensive ones.
The first time I skipped cleaning for a few days, I didn’t notice immediately. The espresso looked fine. Crema was there. But the flavor started tasting slightly dull. Then a little bitter. Not in a “dark chocolate” way. More like something was off in the background.

Coffee oils are sneaky like that
After about 24–48 hours, those oils begin to turn rancid. They cling to the brew group and internal pathways. And every new shot passes over that old residue. You’re basically layering fresh coffee on top of stale buildup.
Milk is even less forgiving
If you’ve ever left milk in a cup overnight, you know what happens. Now imagine that inside thin milk tubes. It hardens quickly. I once skipped the milk rinse “just this one time.” The next morning the frother sputtered slightly. The foam was thin. That was enough of a warning for me.
And then there’s scale
If your water isn’t soft, minerals slowly build up inside the boiler. You won’t see it, but you’ll feel it. Brew temperature drops slightly. Pressure isn’t as stable and extraction suffers. Suddenly you’re wondering why your espresso tastes weak or watery and it’s not the beans.
But here’s the bigger picture.
Dirty brew groups affect extraction directly. Oils change how water flows through the coffee puck. That can lead to uneven pressure and inconsistent shots. A properly maintained super automatic can last 5–10 years, sometimes longer.
Neglecting cleaning doesn’t just affect taste, but also stresses internal components. Pumps work harder, heating elements struggle. Cleaning isn’t about being obsessive. Rather, it’s about protecting flavor and the machine itself.
Want better espresso at home? A reliable machine makes all the difference.
8 Best Super Auto Espresso Machines (2026)
Want café-quality espresso at the push of a button? We break down the top super automatic machines — comparing espresso taste, milk systems, ease of use, and long-term value.
Super Automatic: Daily Cleaning (5–10 Minutes Total)
If you only do one thing consistently with your super auto, make it this: a few minutes a day saves you from bigger headaches later.
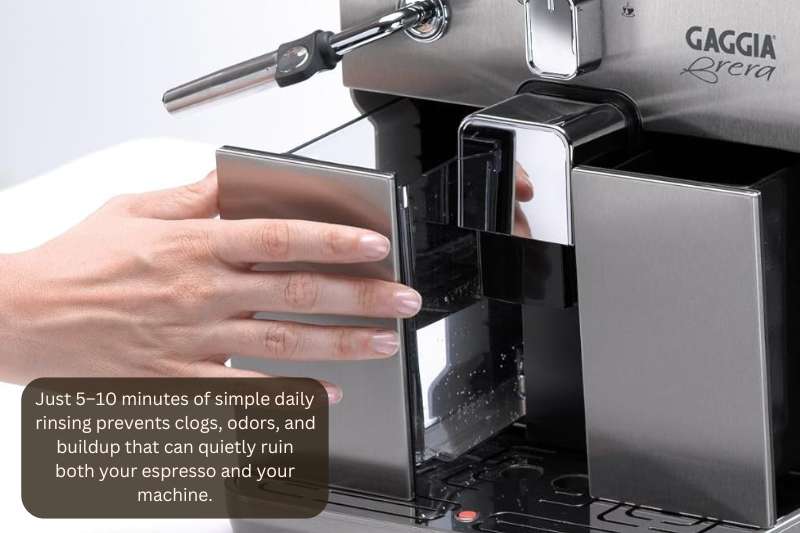
1 – Rinse the Milk System Immediately
Run the automatic milk rinse after every use. Most machines have a quick program. This takes maybe 20–30 seconds. Remove the milk container and put it back in the fridge. Wipe down the external frother parts with a damp cloth.
And don’t let milk sit in the lines. Even a few hours make a difference. Milk is the number one cause of clogs in super-automatics. Not coffee but milk.
2 – Empty and Rinse the Drip Tray
This one feels obvious until you forget. I once let mine fill a little too high. Not overflowing dramatically, but close. When you pull it out, you realize how much coffee residue and water collect there in one day.
Warm water is enough. No heavy soap is needed every time. Just rinse it out so it doesn’t develop that sour, stale smell. Also, mold grows faster than you think in warm and damp trays.
3 – Empty and Rinse the Coffee Grounds Container
Used grounds hold moisture. That’s the part people underestimate. Leave them sitting for 24 hours and they start to smell. A slightly damp and earthy odor. Not pleasant.
I usually empty mine at the end of the day, about 8 to 10 pucks depending on how much I’ve used the machine. A quick rinse prevents buildup and keeps bacteria from getting comfortable.
Weekly Cleaning Routine
Daily cleaning keeps things from getting gross. Weekly cleaning keeps things performing. This is where you prevent the subtle stuff (weak shots, inconsistent pressure) from becoming a real problem.
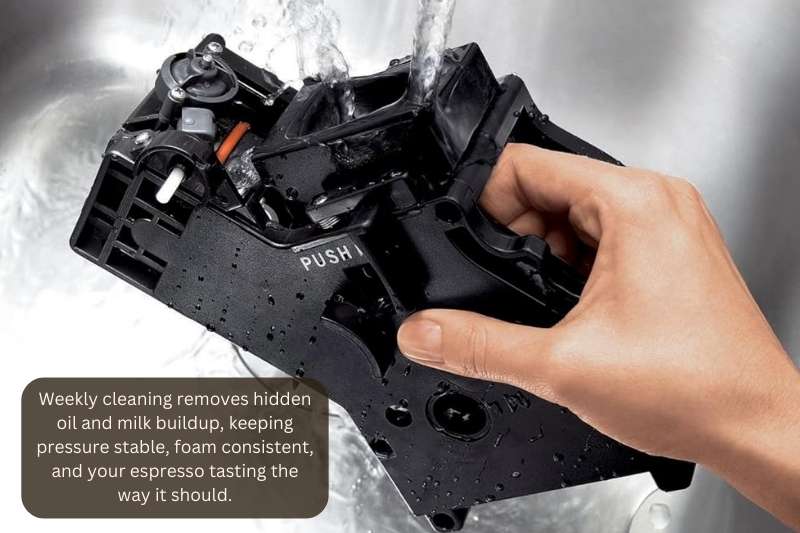
4 – Clean the Brew Group (If Removable)
If your machine has a removable brew group like many De’Longhi, Philips, or Saeco models, this step matters more than people realize.
The first time I pulled mine out, I was surprised by how much coffee oil had built up around the edges. Not dramatic. Just a thin and sticky film. But that film affects how water flows through the coffee puck.
For Jura machines, you can’t remove the brew group. That’s fine. You rely fully on internal cleaning cycles with tablets.
If yours is removable, take it out once a week. Rinse it under lukewarm water. No soap ever. Soap can mess with internal seals and leave residue.
Let it air dry completely before putting it back in. I usually leave mine on the counter for an hour or so. Oil buildup affects pressure. Pressure affects extraction and extraction affects taste. It’s all connected.
5 – Use Espresso Cleaning Tablets
Even if you rinse the brew group, internal coffee oils still accumulate deeper inside the system.
This is where cleaning tablets come in (I usually use Urnex Cafiza tablets, but most manufacturer-approved ones work fine).
It takes maybe 15 minutes, and the machine does the work. You simply drop the tablet in and start the program. Skip this step and you’ll notice it eventually. Shots become slightly weaker and crema less stable. Flavor less clear.
Especially if you own a machine with a non-removable brew group, this step isn’t optional.
6 – Deep Clean the Milk System
This one is easy to ignore because the milk system might look clean. But milk fat builds up inside lines where you can’t see it.
Once a week, I run the manufacturer’s milk cleaning solution through the system. Then I rinse thoroughly afterward. The difference is subtle but real. Foam texture improves. No faint sour undertones.
Weekly cleaning isn’t glamorous. But it keeps your super automatic espresso machine tasting the way it should — consistent, balanced, reliable.
Monthly / Bi-Monthly Maintenance
This is the stuff you don’t see, which is why it’s easy to ignore. Daily and weekly cleaning keeps your super auto tasting good. Monthly maintenance keeps it alive.
7 – Descale the Machine
Scale is boring to talk about. Until it isn’t. If you live somewhere with hard water, minerals slowly build up inside the boiler and internal lines. You won’t see it. You won’t smell it. But you’ll start noticing subtle changes.
Shots take longer to brew. The machine sounds slightly louder. The temperature feels lower than usual. That’s scale interfering with heat transfer and pressure stability.
And here’s the tricky part: scale acts like insulation. It prevents the heating element from doing its job efficiently. Over time, that gradually stresses internal components.
I’ve delayed descaling before because “the coffee still tastes fine.” A few weeks later, the espresso started tasting slightly sour. After running a proper descaling cycle, the difference was immediate. Hotter extraction, better crema, and smoother flavor.
Use the manufacturer-approved descaling solution. Not vinegar. I know vinegar sounds tempting. It’s not worth the risk to seals and internal parts.
Follow the machine’s automatic descaling program. Let it run fully. Then rinse thoroughly afterward.
How often?
It depends on your water hardness and how many drinks you make daily. For some people, every month. For others, every three months.
Pro tip: Using filtered water reduces how often you need to descale. It doesn’t eliminate it but it helps.
8 – Lubricate the Brew Group (If Required)
If you own a Philips, Saeco, or many De’Longhi models with removable brew groups, lubrication matters. Apply a small amount of food-grade lubricant to the moving parts every month or two.
Friction wears parts down over time and lubrication prevents that.
Monthly maintenance isn’t exciting. You won’t see instant dramatic results every time. But skip it long enough and you’ll feel it.
Super Auto: Cleaning Schedule Overview
If you’re anything like me, you’ll remember to clean… until you don’t. That’s why this is worth printing or saving somewhere visible inside a cabinet door, on your phone, wherever you’ll see it.
| Task | Frequency |
| Milk system rinse | After every use |
| Empty drip tray | Daily |
| Empty grounds container | Daily |
| Rinse removable brew group | Weekly |
| Run cleaning tablet cycle | Weekly or every ~200 shots |
| Deep clean milk system | Weekly |
| Descale machine | Every 1–3 months (depends on water hardness) |
| Lubricate brew group (if required) | Every 1–2 months |
Notes: Consistency matters more than perfection. If you miss a day, just reset and keep going.
Signs Your Machine Needs Cleaning Now
Sometimes your super-automatic espresso machine doesn’t flash a warning light. It simply starts acting differently.

1 – The first sign for me is taste
If your espresso suddenly tastes sour or oddly bitter, not in a “this roast is bold” way, but in a sharp, flat, slightly unpleasant way that’s usually from buildup. Old coffee oils affect extraction and scale affects temperature. The flavor shifts before anything else does.
2 – Milk foam is another giveaway
If your cappuccino used to have that smooth, glossy microfoam and now it looks airy or inconsistent, don’t immediately blame the milk. I did that once, then switched brands, adjusted the temperature, tried everything. Then I realized I hadn’t deep-cleaned the milk system in a while. That was the actual problem.
Milk fat buildup is invisible, but it changes texture.
3 – Brewing speed can shift too
If your machine takes noticeably longer to pull a shot (even by a few seconds), that can point to an internal scale restricting flow. It’s subtle. You might not time it exactly, but you feel it. The rhythm changes.
4 – Sound matters more than people think
When my machine is freshly cleaned, it sounds smooth. When it’s overdue for maintenance, the pump sometimes sounds slightly louder or strained.
5 – Error codes related to water flow
Those don’t appear out of nowhere. They commonly build up over time because cleaning cycles were delayed or skipped. I’ve ignored a “clean me” message once thinking it could wait. It didn’t cause immediate failure. But it definitely affected performance.
Here’s the thing
Most super auto problems don’t start with breakdowns. They start with small signs such as taste changes, slower brewing, and thinner foam. Don’t wait for something major to happen. If your machine feels off, it probably needs attention.
Last Thoughts
If you’re unsure about any step, or your machine is behaving in a weird way that doesn’t fit what we covered here, drop a comment below. Tell me what model you’re using and what’s happening. I read them. And chances are, someone else is dealing with the exact same thing. So let’s figure it out together.


