How To Make Coffee Creamer (Easy Recipe You’ll Love)
Last updated on August 11th, 2025 at 05:15 pm
Ever looked at your coffee creamer and wondered what’s actually in it?
I’ve always enjoyed splashing creamer into my morning brew. Sometimes more than I probably should’ve. But one day while grocery shopping, I randomly flipped over the bottle to read the label.
Let’s just say… I couldn’t pronounce half the ingredients, and the other half sounded more like a science project than something I’d want in my cup.
That moment kind of stuck with me. So I started experimenting with homemade coffee creamer and turns out, it’s way easier (and tastier) than I expected.
In this post, I’ll show you exactly how to make your coffee creamer from scratch using simple, real ingredients. Whether you want something dairy-free, keto-friendly, or just more flavorful, I’ve got options and tips to help you make it your own.
Why Make Homemade Coffee Creamer?
I like to do my creamer because I control what is made of. I get to pick exactly what goes in, whether it’s organic half-and-half, oat milk, or sweetened condensed coconut milk. That also means:
- No preservatives.
- No artificial thickeners.
Just stuff that tastes good and doesn’t leave me feeling weird after my second (okay, fourth) cup of coffee.

And let’s talk money…
I used to go through a bottle of creamer a week. At $4–5 a pop, that adds up quickly. Now, with a few pantry staples, I can whip up a week’s worth of creamer for half the price and it tastes way better.
Plus, I love that I can switch up flavors with the seasons. For instance, pumpkin spice in the fall, peppermint mocha in winter, vanilla almond in spring… you get the idea.

Step-by-Step: How To Make Basic Coffee Creamer
Equipment
- Mason jar or any sealable glass container
- Measuring cups and spoons
- Small whisk or spoon (if not shaking)
- Funnel (optional, but helps with no mess)
Ingredients
- 1 can of sweetened condensed milk (or coconut condensed milk for dairy-free)
- 1½ cups milk or cream (can be whole milk, half-and-half, almond, oat, or soy milk)
- 1–2 tbsp of sweetener (maple syrup, honey, stevia, or plain sugar)
- Optional add-ins: 1 tsp vanilla extract, 1 tbsp cocoa powder, a pinch of cinnamon, or flavored syrups
Instructions
- Choose Your Base: Start by combining your condensed milk and your milk or plant-based alternative. For a creamier texture, I personally prefer half-and-half. If you're going dairy-free, coconut condensed milk with oat milk gives a nice richness without being too heavy.
- Flavor It (Optional): This is the fun part. Want classic vanilla? Add a teaspoon of extract. For mocha, stir in cocoa and vanilla. Pumpkin spice? Add the spice blend and vanilla. I once tried cinnamon and cardamom together—kind of like chai creamer—and it was ridiculously good.
- Blend or Shake: Now either whisk everything in a bowl or pour it into your mason jar, seal it, and give it a good shake. You’ll want it smooth and fully combined. Store it in the fridge and use it within 7–10 days. Always shake before using—stuff settles.
Video
Notes
Pro tip:
If you’re using coconut milk, add a tiny pinch of salt. I learned this the hard way—it helps balance the natural sweetness and makes the flavor pop.Favorite Custom Flavor Variations To Try
I’ve played around with so many combos, and while a few didn’t exactly hit the mark (banana-maple was… not it), these are the ones I keep coming back to.
The base recipe I use is 1 can of sweetened condensed milk + 1½ cups of milk or cream. To that, just add the extras below and shake it all up in a mason jar.
French Vanilla – 1 tsp vanilla extract + 1 tbsp brown sugar
This is hands-down my favorite. Something about the blend of real vanilla and that hint of molasses from the brown sugar makes it taste declicious without being too sweet.

Hazelnut – ½ tsp hazelnut extract + 1 tbsp maple syrup
If you love classic hazelnut creamer, this one totally delivers. The maple syrup gives it a deeper, more rounded sweetness than plain sugar.
Cinnamon Roll – ½ tsp cinnamon + ½ tsp vanilla + pinch of nutmeg
I like this one for mornings when I want my coffee with a spicey warmth. Smells like a bakery and tastes like a weekend treat.
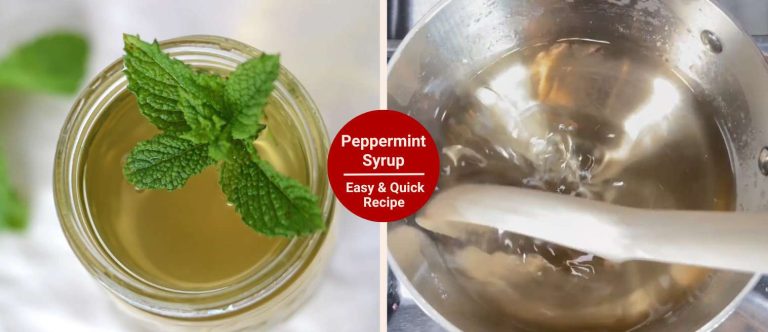
Peppermint Mocha – ½ tsp peppermint extract + 1 tbsp cocoa powder + ½ cup almond milk
Ideal around the holidays. Just go easy on the peppermint (a few drops go a long way). The cocoa brings in that rich chocolatey note.
Salted Caramel – 2 tbsp caramel syrup + pinch of sea salt
I find sweet, salty mix pretty addictive. You shake this one up well and try it in cold brew.
Notes: If you’re feeling bold, mix and match a few flavors. That’s how I stumbled on my cinnamon-vanilla-brown sugar combo—still one of the best “accidents” I’ve made.
Storage & Shelf Life Tips
Well, here’s the thing—homemade coffee creamer doesn’t have all those preservatives you’ll find in the store-bought stuff (which is kind of the point, right?).
But that also means you’ve gotta treat it with a little more care if you want it to stay fresh and safe to use. So, here’s some recommendations:
1 – Store in airtight container or glass bottle in the fridge
I usually use a mason jar or swing-top glass bottle that seals tightly. It helps keep out any weird fridge smells and keeps your creamer from spoiling early.

2 – Use within 7–10 days
This isn’t one of those “maybe it’ll be okay” rules. You should stick to it. I mark the day I made it right on the jar with a little masking tape.
3 – Shake well before each use as ingredients may separate
You’ll notice some settling, especially with cocoa or spices. Give it a solid shake before pouring it into your coffee, or you might just get a sip of plain milk instead of the good stuff.
4 – Can I Make It Sugar-Free or Keto?
A common concern some people have especially if you’re watching carbs or sugar intake is whether homemade coffee creamer can still fit into a sugar-free or keto lifestyle.
I wondered the same thing after cutting back on sugar. But the good news? You absolutely can make a sugar-free or keto-friendly version that still tastes awesome.
5 – Unsweetened Condensed Milk
One of the easiest swaps is using unsweetened condensed milk alternatives. You can find coconut-based versions at some health food stores, or go the DIY route: simmer heavy cream with a bit of erythritol or monk fruit sweetener until it thickens slightly.
It’s not identical to regular condensed milk, but it does the trick, especially once flavored.
6 – Sugar-Free Syrups
For that extra something, I use sugar-free syrups like vanilla or hazelnut from brands like Torani or Jordan’s Skinny Mixes.
A few drops of almond or coconut extract can also elevate things without needing sugar at all. However, don’t overdo the sweetener. Usually, less is more when you’re going for balanced flavor.
7 – For Keto Folks
You can try this version: heavy cream, almond milk, monk fruit, and a little vanilla. It tastes great and keeps your macros in check.
Last Thoughts
Got a question about the process? A flavor combo you swear by? Or maybe a tip you’ve learned along the way? I’d love to read your comments below and with that, we wrap it up with a little ‘voilà!'”