How to Test Your Water for Espresso (Beginner’s Guide)
What’s the one thing most home baristas overlook that can make or break your espresso?
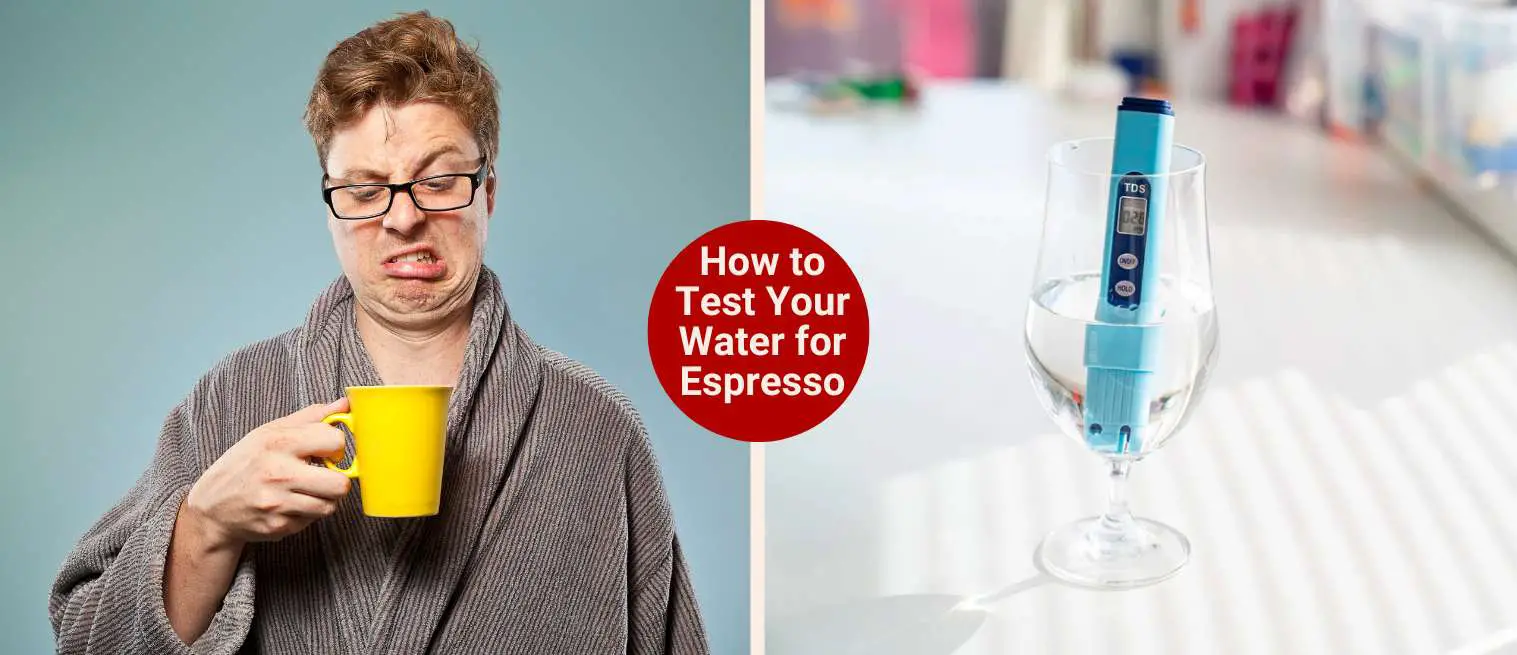
One thing that saved my coffee years ago was learning how to test my water. I had spent months adjusting grind size, changing beans, even questioning my espresso machine.
But nothing seemed to fix that dull, sometimes bitter shot. Well, the real issue wasn’t my technique, but rather my tap water.
It was either too hard or too flat, and I had no idea until I tested it for the first time. That simple step changed everything.
In this guide, you’ll learn how to test your water for espresso, what numbers matter (like TDS, pH, and hardness), and how to tweak your water setup for smoother, better-tasting shots. So let’s start testing!
Key Takeaways
- Espresso is 90–95% water, so testing your water quality is just as important as your beans and machine.
- Aim for ideal water parameters: TDS between 75–250 ppm, general hardness around 50–70 ppm, alkalinity near 40–50 ppm, and pH close to neutral (around 7).
- Use simple tools like a TDS meter, pH strips, and hardness test strips to check your water at home.
- If your water doesn’t measure up, switch to filtered water or try mineral packets like Third Wave Water for better taste and machine longevity.
Why Water Quality Matters for Espresso?
Usually, when people begin, they think about everything else. From their beans, grinder, dose, and tamp. But they miss one key element: water. So, why does this matter? Well…

1 – Espresso is 90–95% Water (Flavor Starts Here)
Your espresso is basically highly concentrated water running through ground beans. If that water tastes funky or is chemically off, it’s going to come through in your cup.
2 – Poor Water Can Cause Bitter, Sour, or Flat Shots
Without minerals like calcium and magnesium, water can’t extract flavor properly. And when there’s too much of them? You get harsh, bitter, or unbalanced notes. The trick is getting the mineral content right. Neither too high nor too low.
3 – Hard Water Can Destroy Espresso Machines Over Time
If your tap water is hard, all those minerals don’t just disappear. They stick to your boiler, group head, and pipes and slowly wreck your machine from the inside out.
I learned this the hard way. Had to descale twice in a single month, and it still wasn’t enough. Now I use filtered water with balanced minerals, and I barely need to clean it beyond regular maintenance. The machine runs smoother, and the espresso? Much better too.
Key Water Parameters to Test
Testing your water might sound like overkill. But once I started checking these key numbers, my espresso went from “meh” to “dang, that’s good.” I recommend you pay attention to the following water parameters:
Total Dissolved Solids (TDS)
The first time I used a TDS meter, I was surprised by how far off my water’s levels were. Basically, TDS tells you how many minerals are floating around in your water.
You want it between 75–250 ppm anymore, and your espresso can taste heavy or murky; too little, and it’ll be weak and sour.

It’s a fast test with a digital meter, and once you see those numbers, you can’t unsee them. I keep my TDS around 150 ppm now, and it’s been a sweet spot for flavor.
General Hardness (GH)
GH tells you how much calcium and magnesium your water has. These minerals are key for good extraction and mouthfeel. But too much will lead to scale in your machine. The ideal range is 50–70 ppm.

When I had water above that, my shots got chalky and over-extracted. Since then, I’ve used test strips every couple of months just to make sure nothing sneaks up on me.
Carbonate Hardness / Alkalinity (KH)
It stabilizes your water’s pH and helps with temperature consistency during brewing. If it’s too low, your espresso might taste sour and too high, and it can taste dull or muddy.
The ideal range is 40–50 ppm. It’s tricky to get perfect, but with a simple strip test, you’ll at least know where you stand.
pH Level
You want water that’s close to neutral (around 7). I once brewed with water that tested around 6, and everything tasted sharper than it should’ve, no matter what beans I used.

On the other hand, if it’s high PH, it can also start affecting your machine. A simple digital pH pen or strip test will get the job done.
After fixing this, I noticed my coffee not only tasted smoother but also stayed consistent daily.
Tools You’ll Need to Test Your Water
You have a few simple tools that make testing easier than you’d think. I was surprised how cheap and quick most of these were to use. So, below you can find the ones I recommend:
TDS Meter (Measures Total Dissolved Solids)
This is the first gadget I bought, and it’s the one I use the most. A digital TDS meter gives you a quick reading of how many total dissolved solids (minerals, salts, etc.) are in your water.

I’ve used the HM Digital TDS-EZ meter, and it’s been solid. It’s affordable and does the job.
Water Hardness Test Strips (For GH and KH Levels)
You’ll need these to check general hardness (GH) and carbonate hardness (KH), both of which affect flavor and scale buildup. These strips are like pool or aquarium test strips. You dip, wait a few seconds, and match the color.

JNW Direct or Hach 5-in-1 strips have worked well for me. They’re cheap and give you a solid ballpark reading.
pH Test Strips or Pen (Checks Acidity or Alkalinity)
If your water’s too acidic or alkaline, it’ll mess with both extraction and your machine’s health. I started with pH strips but eventually upgraded to a digital pH pen for better accuracy.

Apera Instruments PH20 is a solid pick because it’s reliable and easy to calibrate.
Comprehensive Water Testing Kit (Good for Full Profile)
If you’re the “I want all the data” type (guilty), you can grab a full water testing kit covering everything. From TDS, hardness, chlorine, iron, nitrates, and whole shebang.

I suggest the Varify Premium Kit or Safe Home Water Test Kit. Both are great all-in-one options.
Optional – Contact Your Local Water Utility for an Annual Report
Here’s a free tip: your city’s water utility likely publishes an annual report with detailed water quality info. It won’t give you exactly what’s coming out of your tap.
However, it’s a great starting point especially if you want to avoid buying tools right away. That’s how I first learned I had high calcium levels in my tap water… and that explained a lot.
How to Test Your Espresso Water at Home (Step-by-Step)
Testing your espresso water doesn’t require a science degree. You only need a few of the mentioned tools and some patience. So here’s how you do it:

Step 1: Collect a Fresh Water Sample
Grab a clean glass or jar and fill it with cold tap water (or whatever water source you normally use). Then make sure it hasn’t been sitting around. You should test right after collection to get the most accurate results.
I always rinse the container first to avoid cross-contamination from coffee oils or cleaners.
Step 2: Use a TDS Meter to Measure Total Minerals
Turn on your digital TDS meter and dip it into the water. You’ll get a quick readout of parts per million (ppm), which is your total dissolved solids. You want something between 75–250 ppm for espresso brewing.
Step 3: Dip Test Strips to Check Hardness and Alkalinity
Next, grab your GH/KH water hardness test strips. You dip one into your sample for a few seconds, shake off the excess, and compare the color to the included chart.
You want 50–70 ppm for general hardness and about 40–50 ppm for alkalinity (carbonate hardness).
Step 4: Use pH Test to Determine Acidity
Using either pH strips or a digital pH pen, test your water’s pH level. For espresso water should hover around neutral pH about 7.0.
If it’s too acidic (below 6.5) or too alkaline (above 7.5), it can affect both taste and machine health.
Step 5: Record Results and Compare to Ideal Espresso Water Standards
Jot down everything such as TDS, GH, KH, and pH. Then compare your numbers with the recommended espresso ranges.
I keep mine in a little notebook next to my grinder. This has helped me troubleshoot shot problems more than once.
Notes: That’s it! Once you get the hang of it, the whole thing takes less than 10 minutes.
What to Do If Your Water Isn’t Ideal?
If your test results are off don’t panic. The fact is fixing bad water is easier than it sounds, and you’ve got a few solid options to improve your espresso fast.
Use filtered water to reduce chlorine and heavy metals
I suggest taking this first step because it makes a huge difference. A basic pitcher filter (like Brita or ZeroWater) removes the junk that messes with flavor, like chlorine, rust, or copper.

Try bottled water optimized for coffee (e.g., Third Wave Water)
Some bottled brands (or mineral packets you add to distilled water) are made for brewing. They hit that sweet spot of minerals without the scale. Third Wave Water is my personal favorite because it’s easy and consistent.

Avoid softened water with added sodium or distilled water with no minerals
Softened tap water can mess up flavor and your machine over time. And distilled? It’s just too “pure” you need some minerals for flavor and to avoid sensor issues in your machine.
Notes: Want a full breakdown of the best water options? Check out my in-depth guide right here: Best Water for Espresso Machines.
Espresso Water Testing Tips & Best Practices
Once you get the hang of testing your espresso water, the trick is keeping things consistent over time. So, here are a few habits that will help you:

1 – Test every few months
Your water might seem fine today, but things can change without warning. I once moved just two blocks away and my espresso went from smooth to sour overnight. A quick test saved me weeks of head-scratching.
2 – Label and track your water results alongside brew notes
I recommend keeping a little notepad (or a simple spreadsheet) where you write down TDS, hardness, and pH next to your favorite espresso shots.
Over time, you’ll see patterns and know exactly what water works best with your beans.
3 – Adjust your brew method slightly if water fluctuates
Even if your water changes slightly, try tweaking your grind size or brew ratio before tossing your whole setup. Sometimes a half-notch coarser or a second shorter can balance things back out.
4 – Clean and calibrate your testing tools regularly
If your TDS meter is giving weird results, you need to rinse or recalibrate it. These tools aren’t totally foolproof. For this reason, take a minute to clean them and double-check with a calibration solution now and then.
Last Thoughts
Alright, now it’s your turn. Have you tested your water and discovered something interesting or frustrating? Maybe you’ve got a weird pH reading you’re trying to decode, or a favorite bottled water brand that’s worked wonders with your espresso?
Whatever it is, I’d love to hear it. So, drop your questions, tips, or even a water-related espresso fail in the comments.
Questions? We Have Answers.
Get answers to a list of the most Frequently Asked Questions.