
5 Hacks to Reduce Sediment in Your French Press
Ever take a sip of your French press coffee and get a mouthful of grit at the end?
That was me when I first started brewing with my press. I loved the bold, full-bodied flavor it gave compared to my drip machine. But every time I got near the bottom of the cup, I’d hit that muddy sludge and it drove me crazy.
It felt like I had to choose between great flavor and a clean cup.
Here’s the good news: you don’t have to. The problem isn’t the French press itself. But it’s usually technique. A few small tweaks can make a big difference.
In this guide, I’ll walk you through a simple French press coffee grit fix. You’ll learn why sediment shows up, five proven ways to cut it down, and even some bonus tricks if you want your brew extra smooth. So let’s start brewing!
Quick Cheat Sheet: 5 Ways to Reduce Sediment
In a rush? Here’s the short version. If you’d like more details, keep reading the full guide below.
| Tip | Quick Fix | Why It Works |
|---|---|---|
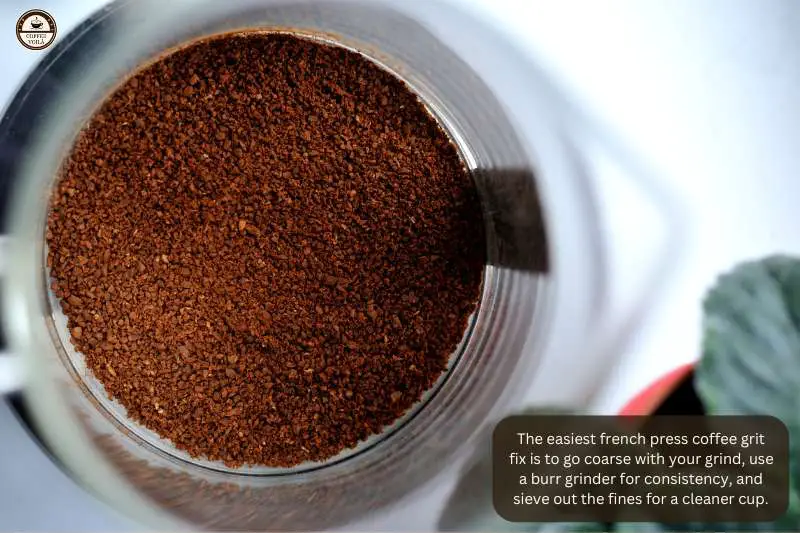
| 1. Use the Correct Grind Size | Go coarse, like sea salt. | Prevents fine grounds from slipping through the mesh. |
| 2. Let Grounds Settle Before Pouring | Wait ~30 sec after plunging. | Sediment sinks, giving you a cleaner pour. |
| 3. Don’t Push the Plunger All the Way | Stop just before the bottom. | Keeps fines from being forced back into the cup. |
| 4. Upgrade or Double Your Filter | Add a tighter or second mesh filter. | Catches more particles and reduces grit. |
| 5. Skim the Crust Before Plunging | Scoop out floating grounds with a spoon. | Removes excess sludge before pouring. |
Why Does French Press Coffee Have Sediment?
If you’ve brewed with a French press for any amount of time, you’ve probably stared at the bottom of your cup and thought: what’s with all that sludge?
Well, don’t worry! It’s not a mistake in your technique (at least not always). The fact is that sediment is part of how this brewing method works.

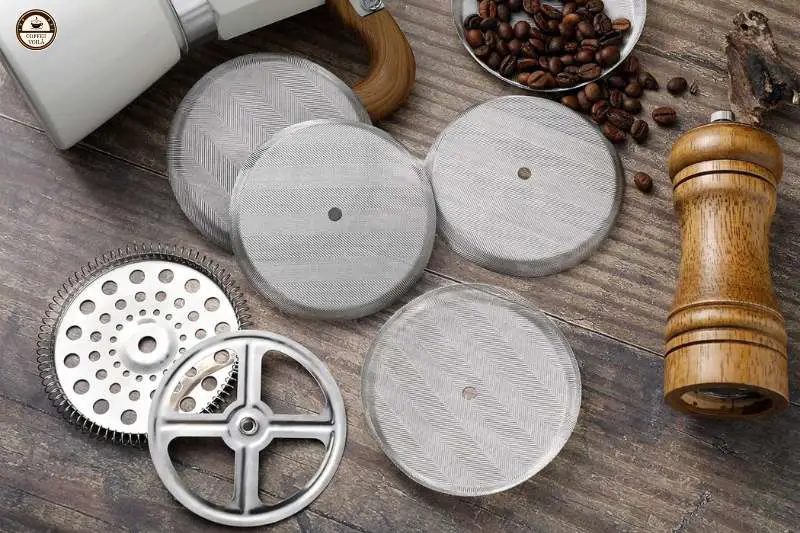
Metal Mesh
Unlike pour-over or drip machines, the French press uses a metal mesh filter instead of paper. That mesh lets the natural oils from the coffee slide right through.
This is one of the reasons French press coffee tastes so rich and full-bodied. However, the problem is that those tiny coffee particles, called “fines,” also sneak past. And yep, they collect at the bottom of your mug.
Incorrect Grind Size Makes It Worse
Here’s where most people run into trouble: grind size. If you’ve ever used store-bought espresso grounds in a French press (I did, once), you already know the disaster waiting on the other side.
The fines slip through the mesh, and instead of bold, smooth coffee, you get a muddy, silty cup that feels like chewing wet sand.
The fix is simple but non-negotiable: go coarse. Think sea salt and not table salt.
Natural Oils and Tiny Fines Are Part of the Style
Sediment isn’t all bad. That faint layer of micro-particles suspended in the brew is why French press coffee has so much more body than drip coffee.
It gives you that heavier mouthfeel, almost like velvet on your tongue. Without it, your cup would taste flat, closer to filtered coffee. So don’t obsess over eliminating every single speck. A little bit of grit is a feature, not a flaw.
What Do You Want?
Do you want a squeaky-clean cup, or are you okay with a little texture in exchange for big flavor? If you’re after absolute clarity, you might be happier with a pour-over or AeroPress. But if you’re here for the bold, oily richness, then the French press will always come with a bit of sediment.
5 Proven Ways to Reduce Sediment
So here are a few tweaks that have helped me out and will do the same for you.
1 – Use the Correct Grind Size
If I had to point to the number one issue of sludge, it’s grind size. Initially, I simply grabbed the bag of pre-ground espresso coffee. After all, that was what I used for my Barista Express machine (we tend to be lazy).
But a French Press isn’t the same as an espresso machine. The result was a cup so gritty I thought I’d need dental floss afterwards.
So here’s the rule…
Go coarse. As I said before, you want something similar to sea salt. The problem is fine grinds slip right through the metal mesh filter, and once they’re in the cup, there’s no getting them out.
Even worse, they keep steeping while you drink, which leaves you with bitter coffee halfway down.
Not all grinders are created equal
A burr grinder crushes beans evenly, which means fewer fines (the tiny particles that cause sludge).
Meanwhile, blade grinders chop beans into random sizes. Some boulders, some dust and that dust is what sneaks into your cup. I’ve used both, and the difference is night and day.
Even a burr grinder can create more fines than you want if the burrs aren’t great quality. I learned this the hard way with a budget grinder that claimed to be “perfect for French press.”
Then, I upgraded to the Baratza Encore, which gave me a cleaner brew immediately.
Sieve Hack
After grinding, shake the grounds through a kitchen sieve to remove the dust. You’ll lose a few grams, but the payoff is worth it: a smoother cup with way less sludge at the bottom.

Some people even spread their grounds on a paper towel to let the fines stick before brewing (old-school trick, but it works).
One more tip: lighter or medium roasts tend to break down into fewer fines than dark roasts. So if you’re struggling with a muddy cup, switching beans could help as much as upgrading your grinder.
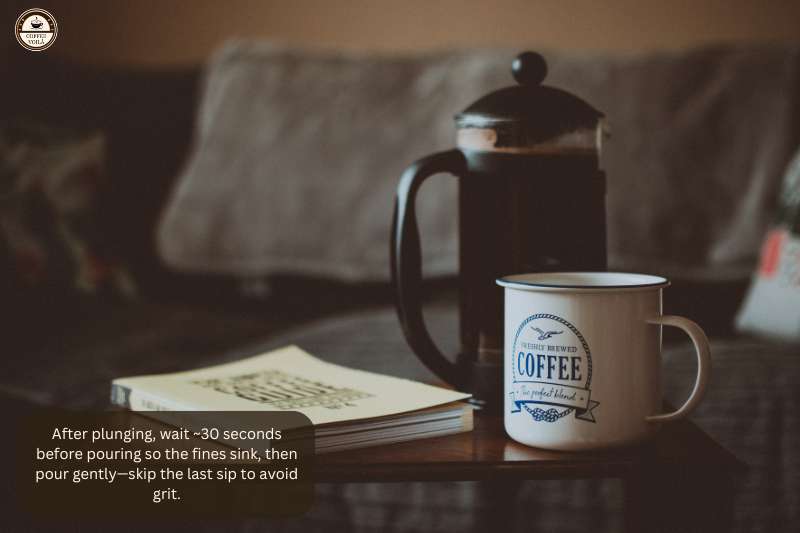
2 – Let Grounds Settle Before Pouring
Here’s a mistake I used to make all the time: as soon as I plunged, I poured straight away. I figured, the brewing is done, let’s drink. But what I didn’t realize is that the French press is still full of tiny suspended particles swirling around and waiting to ruin that first sip.
If you pour too quickly, all that sludge gets kicked back up and into your cup. And there’s nothing worse than taking a sip of smooth coffee and suddenly crunching on grit between your teeth. That’s when I learned you should wait around 30 seconds.
So, here’s what you do?
Once you’ve plunged, set the press down and walk away for half a minute. That pause lets the fines (those microscopic bits your grinder produced) settle into a compact layer at the bottom.
In other words, the way you pour matters as much. A fast, sloshy pour will stir everything up again. Instead, tilt your French press gently and let the coffee slide into your mug in a smooth stream.
I even stop pouring once I reach the last half-inch of liquid, because that’s where the murky stuff lives. Basically, don’t chase the last drop.
My experience…
I’ve compared this method side by side. One morning, I poured right away, and the bottom of my mug looked like wet sand. Another day, I let it settle and poured carefully, and the coffee was way cleaner. It was still bold and full-bodied, but without the mouthful of sludge.
Some people even stretch this wait time to 1–2 minutes if they want an extra clear cup. It’s like giving gravity a chance to do some filtering for you. You won’t lose flavor, but you’ll lose a lot of grit.
Tip: If you hate sediment, combine this with a sieve or secondary filter (I mentioned this trick earlier). But honestly, waiting 30 seconds and pouring gently solves 80% of the problem without needing any extra gear.
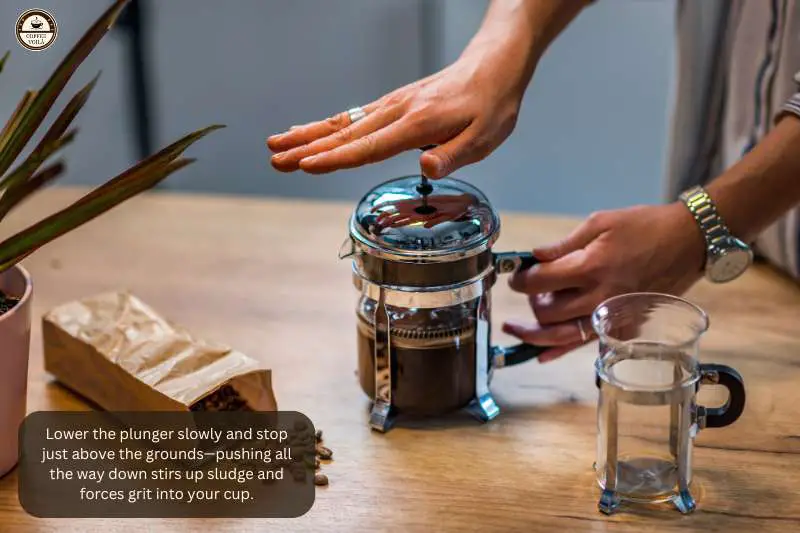
3 – Don’t Push the Plunger All the Way Down
For the longest time, I thought pressing the plunger harder meant I was “squeezing out” every last drop of flavor. I’d slam it down until it hit the bottom, sometimes even giving it an extra push. But instead, I got a cup that was murky and gritty.
The truth is, that final push doesn’t add flavor; it adds sludge. When you force the plunger all the way down, you’re stirring up the bed of coffee grounds at the bottom.
Those fines (tiny dust-like particles that naturally form when grinding) get pushed right through the mesh filter and into your cup. And once they’re in, there’s no escape.
So here’s a trick:
Stop just before you hit the bottom. Think of the plunger like a lid, not a bulldozer. It should rest gently on the coffee bed, holding everything in place and not smashing it.
When you go slow and steady, around 20–30 seconds to lower it, you’ll notice the difference instantly. The cup comes out smoother and with body, but without the grit.
Some people even leave the plunger hovering an inch above the grounds and simply pour, letting the filter act more like a strainer. I’ve tried this too, and while it feels odd at first, it does cut down on sediment.
Sure, you might leave a little liquid behind, but would you rather sacrifice half a sip or ruin the whole cup with sludge? Easy guess!
Tip: If you want to take it even further, combine this with the sieve hack (shake out the fines before brewing). That way, you’re preventing sludge at the start and avoiding it at the finish.
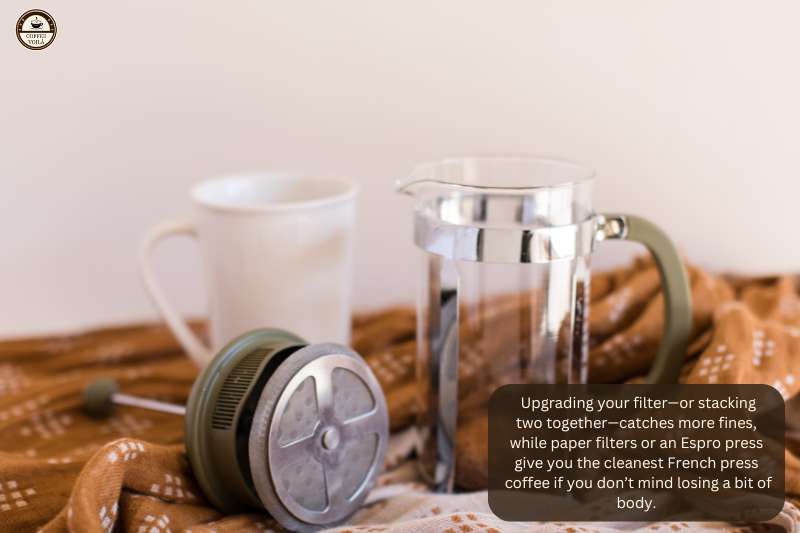
4 – Upgrade Your Filter or Add a Secondary Filter
If there’s one tweak that surprised me most, it was upgrading the filter. I always thought, “a mesh filter is a mesh filter, right?” Nope. The issue is that the stock filters that come with most presses allow more fines to slip through than you might think.
Once I swapped mine for a tighter weave aftermarket filter, my cup instantly went from gritty to smooth.
But here’s the thing:
You don’t even have to buy anything new right away. A simple hack is stacking two French press filters together. The first time I tried this, I wasn’t expecting much.
Yet when I poured my coffee, there was noticeably less sludge at the bottom. It’s not a miracle fix, but it’s cheap, quick, and works better than forcing the plunger harder.
If you want an ultra-clean cup…
For this, there’s the paper filter trick. You can pour your French press coffee through a regular drip filter, a fine kitchen sieve, or even the cap of an AeroPress.
I’ve done this when serving guests, because most people don’t love that last muddy sip.
What about the Espro Press?
I’ve also played around with the Espro Press, which has a much finer double-layer filter built in. It does reduce sediment dramatically.
But here’s my opinion: it also strips away some of that heavy, textured mouthfeel that makes French press unique. In other words, you trade some body for cleanliness. And that’s not a bad thing; it depends on your preferences.
Notes: If you’re on a budget, stack your filters. If you want convenience, try a sieve or paper filter. And if you’re serious about a cleaner press, go for a finer aftermarket filter or a brewer like the Espro. The key is experimenting until you find what works for you.
5 – Skim the Crust Before Plunging
This one might sound a little odd if you’ve never tried it, but skimming the crust before plunging can make a difference.
You know that thick layer of foam and floating grounds that forms on top after steeping? That’s what baristas call the “crust.” And if you plunge straight through it, all those loose bits get stirred right back into your brew.
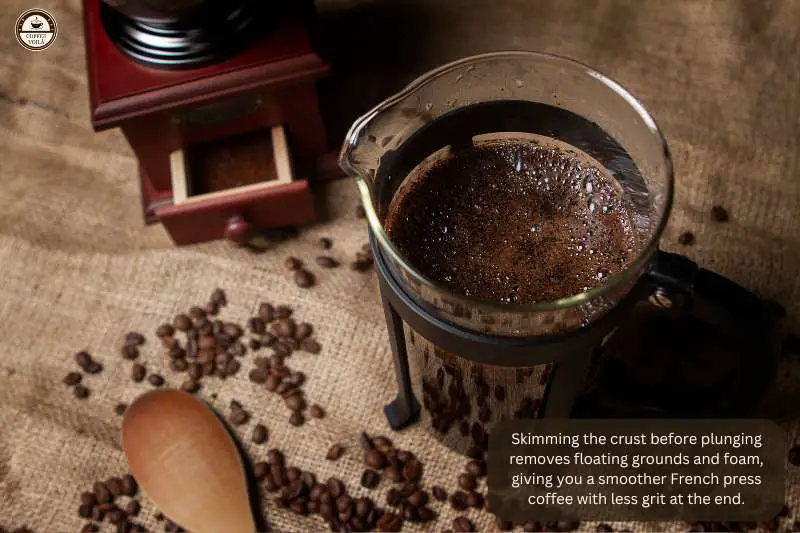
I used to think breaking the crust was unnecessary. I’d brew my French press, slam the plunger down, and then wonder why the last half of my cup felt like gritty hot chocolate.
Once I started skimming instead, my coffee came out smoother, cleaner, without that muddy end.
So, how can you do this?
Once your coffee has steeped for about 4 minutes, take a spoon (or better yet, two spoons) and gently stir to break the crust. You’ll see the grounds sink, leaving behind a foamy slurry floating on the surface. That’s what you want to scoop out and toss in the sink.
It takes maybe 15–20 seconds. However, it saves you from having all that loose coffee sneak through the mesh filter.
Bonus trick
If you’re not ready to buy better gear, simply skim with two spoons before plunging. Pinch the floating bits between the spoons and scoop them away. It’s a simple hack, but it cuts sediment dramatically.
Now, does this remove every single fine particle?
No. You’ll still have that signature French press body, which comes from microsediment. But it does reduce the “sludge” effect when you get to the bottom of the cup.
Last Thoughts: Do You Need a Completely Clean Cup?
French press coffee isn’t meant to be spotless. That bit of sediment you see at the bottom of the cup? It’s part of what gives the brew its heavy body and rich mouthfeel. Something paper-filtered methods can’t quite match.
Of course, you can cut it down with better grind size, upgraded filters, or careful pouring, but you’ll never remove it completely.
Now I’m curious: do you prefer your coffee silky smooth, or do you embrace the grit as part of the charm? Have you tried any tricks to reduce sediment that worked for you? Go below and drop your thoughts in the comments. I’d love to hear them. Voilà.


