
How To Do Latte Art (Step-By-Step For Beginners)
Ever wondered how baristas create those beautiful latte art designs that seem almost too perfect to drink?
I remember before I started Coffee Voila, I’d visit this local coffee shop where every cup came with stunning latte art. Hearts, rosettas, swans—you name it, they could pour it.
I’d sit there, mouth open, in awe of how effortlessly they turned coffee into art. It seemed like magic!
After starting my blog, I decided to give it a try myself. Well, let’s just say it wasn’t exactly smooth sailing. My first attempts were, well, abstract—more blobs and splashes than hearts and tulips.
But with practice, patience, and a lot of trial and error, I started to see real designs forming, and the joy of creating latte art finally clicked for me.
In this guide, you’ll learn everything you need to know to start your own latte art journey from the tools and techniques to step-by-step instructions for creating popular patterns. So let’s start brewing!
What Is Latte Art?
Latte art is the practice of creating designs or patterns by pouring steamed milk into a freshly pulled espresso shot.
The perfect microfoam interacts with the espresso’s crema, allowing you to craft beautiful designs like hearts, rosettas, or tulips. Even the simplest design, like a heart, can make your coffee feel more special.

Cultural Significance: A Symbol of Skill
Baristas take pride in mastering the pour, showcasing their expertise in creating silky microfoam and pulling perfect espresso shots. Also, latte art competitions have even become popular, where baristas display intricate designs that blend technique with creativity.
Popularity: A Social Media Darling
Latte art has taken over Instagram and TikTok, with stunning creations shared by both professional baristas and home brewers.
These designs transform a simple drink into a creative experience, turning coffee-making into an art form. It’s not just about aesthetics—it’s about turning a daily ritual into something extraordinary, and who doesn’t love sipping on a cup that’s both delicious and beautiful?

How to Create Latte Art: Step-by-Step
Equipment
- Espresso Machine: You’ll need one with a steam wand to create the microfoam essential for latte art.
- Milk Frothing Pitcher: A stainless steel pitcher with a spout gives you the control needed for precise pouring. The size matters, too 12-20 oz pitchers are great for beginners.
- Fresh Ingredients: Always use high-quality espresso for a rich crema, and stick to whole milk for the creamiest foam. If you prefer non-dairy, oat milk works well and froths beautifully.
- Additional Tools (Optional): Latte art pens can help with intricate designs, and a thermometer is handy for beginners to avoid overheating milk.
Instructions
- Pull a Perfect Espresso Shot: Start with freshly ground coffee and tamp it evenly to ensure consistent extraction. A rich, golden crema on top is your canvas for latte art. If your espresso is watery or lacks crema, it might be time to revisit your grind size or tamping pressure.
- Froth the Milk: Frothing milk is all about creating microfoam. A smooth, silky texture without large bubbles. For this, submerge the steam wand just below the surface of cold milk and listen for a gentle hissing sound. Once the milk starts expanding, lower the wand slightly to heat it evenly. You want a glossy finish with a temperature of 140-150°F.
- Pour the Milk: Hold your milk pitcher at a slight angle and start pouring slowly into the center of the espresso. As the foam begins to appear, bring the pitcher closer to the surface and adjust the flow for control. This is where the design starts to take shape.
- Craft the Design: If you’re new to latte art, begin with simple patterns like a heart or tulip. Once you’ve mastered those, challenge yourself with rosettas or advanced designs like swans. The key is steady hands and patience—don’t rush the pour.
- Refine and Serve: For extra flair, use a latte art pen to add finishing details. Serve your drink immediately to preserve the design and enjoy your masterpiece. And remember, even if the art isn’t perfect, the coffee still tastes amazing!
Notes
Popular Latte Art Patterns
When it comes to latte art, there’s something deeply satisfying about pouring that first recognizable design. I’ve been there and my first heart looked more like a blob. However, with practice, I started creating patterns that actually impressed my friends (and myself).
Beginner Designs
Heart: This is the classic starting point for most beginners. The trick is to pour steadily, allowing the milk to settle into the center of the espresso.

My early attempts were messy, but once I learned to slow down and control the pour, my hearts started looking more intentional and a lot less like jellybeans.
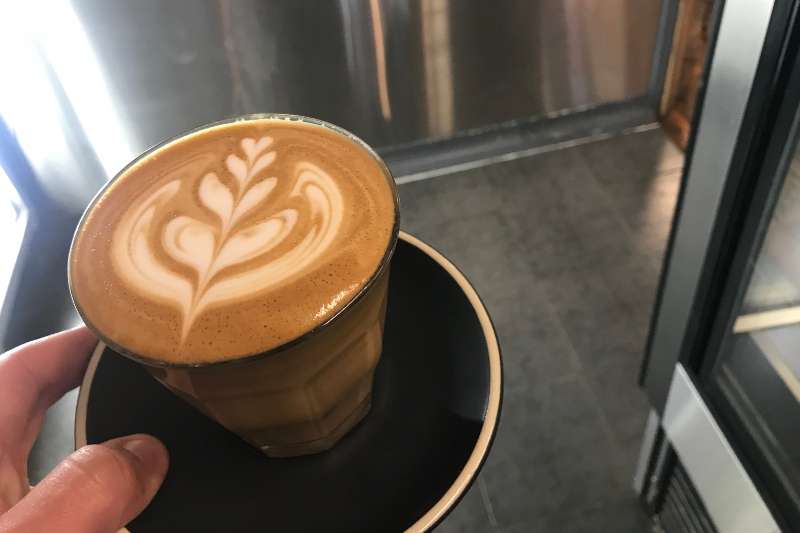
Rosetta: The rosetta is a bit more challenging but incredibly rewarding once you nail it. It involves a controlled wiggle as you pour to create the leaf-like design.

My first few tries? Let’s just say they were more “abstract art” than anything else, but the process taught me patience.
Tulip: The tulip is another beginner-friendly design that looks intricate but is surprisingly simple. It’s all about layering small pours to create the petals. It took me a while to master the balance of foam and milk, but the results were totally worth it.
Advanced Designs
Swan: The swan is where things get really impressive. It combines multiple moves such as hearts, rosettas, and curves to create a graceful shape. When I first tried it, I ended up with something that looked more like a duck, but hey, progress is progress!

Phoenix: The phoenix is a showstopper, often seen in latte art competitions. It requires precision and a lot of practice to get those flowing lines just right. I haven’t quite perfected it yet, but it’s on my bucket list.

Free-pour Creations: Once you’ve got the basics down, free-pour designs let you get creative. Think flowers, animals, or even abstract shapes. This is where you can let your imagination run wild, and honestly, it’s the most fun part of latte art.
Tips for Perfecting Your Latte Art
Latte art is as much about technique as it is about practice, and with a few tips, you can level up your skills in no time.
1 – Master the Microfoam
Creating silky microfoam is the foundation of good latte art. Make sure the milk is aerated correctly by keeping the steam wand just below the surface to introduce air, then lower it to heat the milk evenly. The result should be glossy and velvety, not bubbly or stiff.
2 – Practice Pouring Techniques
A steady hand and controlled flow are key to achieving clean designs. You want to angle your pitcher slightly and pour slowly. Then adjust the flow as you go. When I started, I’d rush through the pour, and my designs looked more like inkblots than latte art. Taking my time changed everything.
3 – Experiment with Milk Types
Whole milk is ideal for latte art because of its fat content, which creates creamy foam. However, non-dairy options like oat milk can also work well. Just be prepared for slight differences in texture. For instance, some alternatives are trickier to froth but still taste fantastic.
4 – Learn from Mistakes
Well nobody enjoys making mistake. However, imperfect latte art can still taste amazing! My early attempts were far from Instagram-worthy, but I enjoyed every cup anyway. Each mistake teaches you something new. So don’t be afraid to experiment and have fun.
Common Mistakes to Avoid
I’d like to mention a few common mistakes I faced. Here’s what to watch out for and how to fix it:

Overheating Milk
Overheated milk is one of the easiest mistakes to make, especially when you’re focused on frothing. When milk gets too hot (over 160°F), it burns and loses its creamy texture, making it harder to pour clean designs.
I’ve been guilty of this plenty of times, but keeping a thermometer on hand. Or just touching the pitcher to feel when it’s warm but not scorching helped me get it right.
Too Much Foam
Adding too much air while frothing creates big bubbles and stiff foam, which makes it almost impossible to pour smooth patterns. You want a silky microfoam that integrates seamlessly with the espresso.
If you’ve overdone it, tap the pitcher on the counter and swirl it to smooth things out. Trust me, less is more when it comes to foam.
Rushing the Pour
Pouring too quickly can make even the best microfoam lose its shape, leaving you with a blob instead of a clean design. I learned the hard way that patience is key—slow, steady pours allow you to control the flow and guide the pattern into place.
If you feel like you’re rushing, pause and reset your grip before starting again.
Last Thoughts
Do you have any latte art tips or tricks up your sleeve? Maybe a favorite design you love to pour? Share your thoughts, questions, or experiences in the comments. I’d love to hear how you’re mastering this craft and with that voilà!
Questions? We Have Answers.
Get answers to a list of the most Frequently Asked Questions.


I always spent my half aan hour to read this web site’s posts daily along
with a mug of coffee.