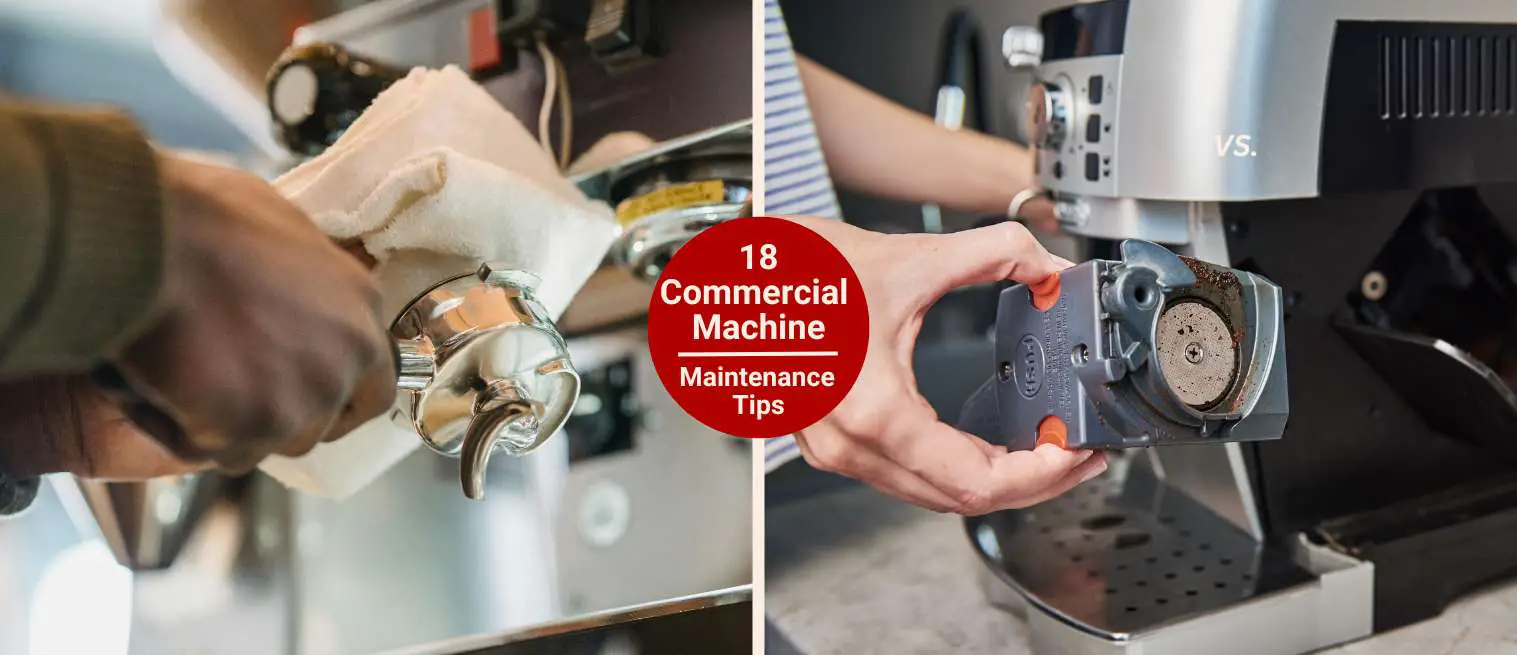
18 Maintenance Tips for Commercial Coffee Machines
Ever wonder why your espresso machine never quite runs like the one at your favorite café even though you swear you clean it?
I get it. I’ve always said I don’t run a coffee shop. I’m more of a home barista kind of guy. But a couple of my close friends do run actual cafés, and let’s just say… I’ve annoyed the heck out of them picking their brains about espresso machine care.
I wanted to know everything, such as what they do daily, what they skip (never much), and how they keep their machines running like clockwork through hundreds of drinks a day.
I realized there’s a big difference between wiping things down and really maintaining your machine. And if you want consistent flavor, better steam power, and to avoid expensive breakdowns, it pays to treat your machine more like they do.
In this guide, you’ll learn 18 practical espresso machine maintenance tips. I’ve broken it down by daily, weekly, monthly, and long-term care. So let’s start brewing!
18 Must-Know Maintenance Tips for Commercial Espresso Machines
Here’s a helpful summary table for readers who want a quick glance at all 18 espresso machine maintenance tips, broken down by frequency and focus:
| # | Maintenance Tip | What It Does | How Often |
|---|---|---|---|
| 1 | Backflush with water | Clears coffee oils from group head | Daily |
| 2 | Wipe group head gasket | Prevents grounds buildup that affects sealing | Daily |
| 3 | Rinse portafilter and basket | Keeps old coffee residue from ruining new shots | After each use |
| 4 | Soak baskets and portafilters | Deep cleans oils and buildup | Nightly or Weekly |
| 5 | Clean drip tray | Avoids clogs and sour smells | Daily |
| 6 | Wipe exterior surfaces | Maintains cleanliness and appearance | Daily |
| 7 | Use a group head brush | Loosens grounds stuck around the gasket | Daily |
| 8 | Scrub under the portafilter | Removes trapped oils under the spouts | Daily |
| 9 | Purge and wipe steam wand | Prevents milk buildup and clogs | After each use |
| 10 | Inspect steam wand tip | Unclogs steam holes for even frothing | Weekly |
| 11 | Clean water softener / replace filters | Prevents scale and improves water quality | Monthly |
| 12 | Check pump and boiler pressure | Ensures consistent extraction and steam power | Monthly |
| 13 | Inspect gaskets and seals | Stops leaks and pressure loss | Monthly |
| 14 | Calibrate the grinder | Keeps shot times and flavor consistent | Weekly |
| 15 | Clean the brew group (if removable) | Keeps internal parts clear in super-automatics | Weekly/Monthly |
| 16 | Keep a maintenance log | Tracks cleanings, helps with service or warranty issues | Ongoing |
| 17 | Schedule professional servicing | Deep inspection and tune-up by certified technician | Every 6–12 months |
| 18 | Train staff on proper use and care | Prevents user errors that cause damage | Regularly |
1 – Backflush the Group Heads
The fact is skipping your daily backflush is a fast way to funky shots. At first, I honestly thought it was something only cafés had to worry about.
But after tasting a few bitter, weirdly sour shots and realizing they came from a gunky group head, I got the message.
Now, I never skip it. I grab the blind filter (the one with no holes), drop in some cleaner Urnex Cafiza, which works like a charm, and run a few brew cycles.
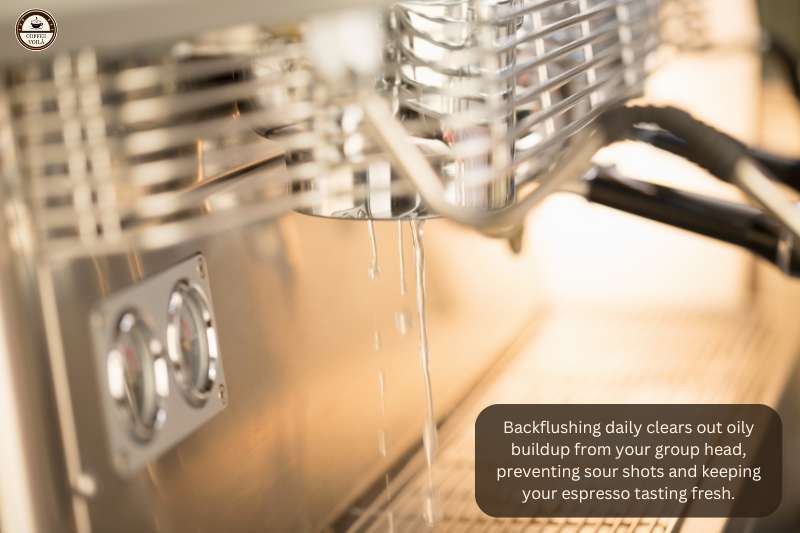
You’ll hear a sharp whoosh as the pressure dumps into the drain tray. That’s the machine clearing out all the oily buildup from the valves and shower screen.
It’s wild how fast those coffee oils stack up if you pull a few shots a day. If you don’t clean it out, it’s like brewing espresso through yesterday’s leftovers.
After the detergent cycles, I always rinse with clean water a few times just to be safe. It takes less than five minutes, and it’s way better than dealing with blockages or wondering why your espresso suddenly tastes like burnt socks.
2 – Clean Your Machine Portafilters and Baskets
One of my friends runs a small café, and he takes espresso machine cleaning seriously, especially when it comes to the portafilters and baskets.
The reason is skipping this step means leftover oils and grounds affect the flavor of every new shot. This may also compromise the freshness and clarity of your espresso.
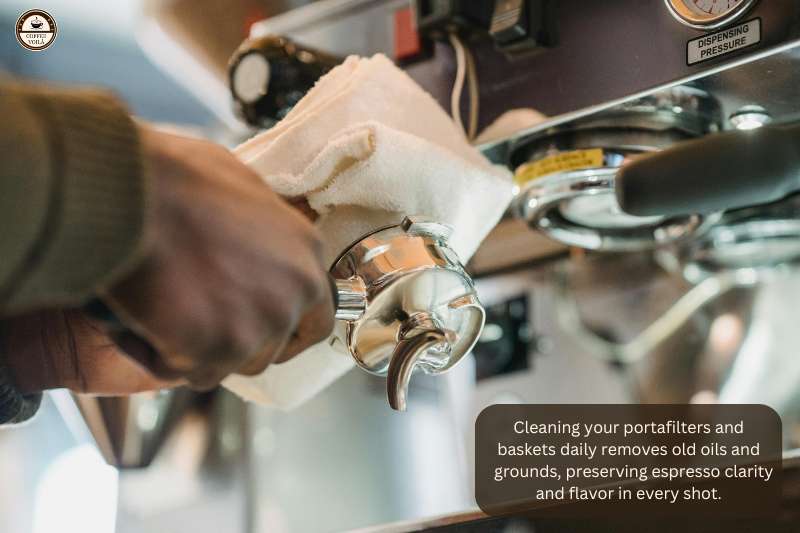
He scrubs the underside of the portafilter every day using a stiff-bristle brush to knock off any lingering coffee residue. And if it’s been a long, busy shift or they’ve been using, especially oily beans, he’ll even rinse everything out mid-day to keep things fresh.
A great tool he recommends for this job is the Pallo Coffeetool Group Head Brush.

It’s made specifically for espresso machines, with stiff nylon bristles that scrub off built-up coffee oils and grounds without scratching the metal.
Furthermore, it has a built-in detergent scoop and an ergonomic handle. So, it’s easy to reach under the portafilter or around the group head.
3 – Wipe Down the Steam Wand After Every Use
You don’t want to wait until the end of the day. Instead, wipe the steam wand immediately after each use.
The fact is milk dries fast, and once it crusts over, it’s way harder to clean. Plus, dried milk residue can harbor bacteria and mess with the flavor of your next drink.
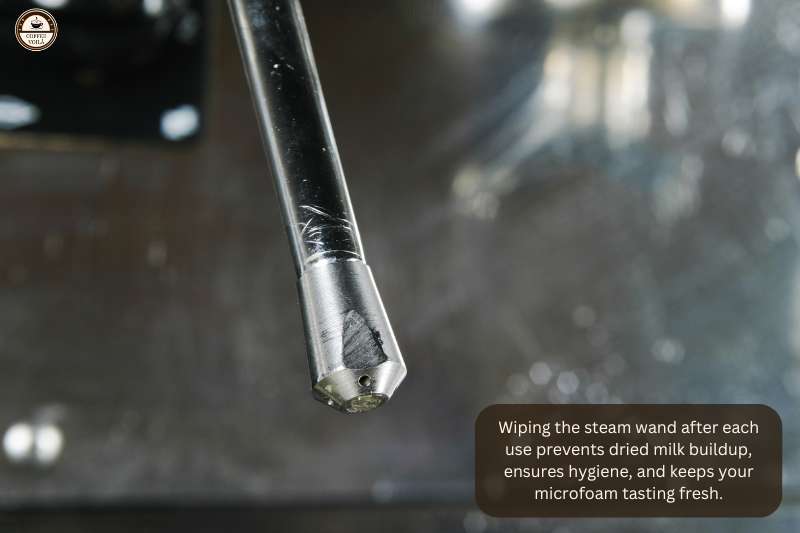
For this reason, I suggest keeping a clean, damp microfiber cloth next to the machine and giving the wand a thorough wipe right after steaming.
Then, purge a short burst of steam to clear out any milk trapped inside the tip. It takes about five seconds, but skipping it can lead to buildup that’s tough to remove later and nobody wants burnt milk in their latte.
Make it a habit after every drink and your machine (and your customers) will thank you.
4 – Empty and Rinse the Drip Tray
The drip tray collects water, coffee splashes, stray grounds, and milk. Basically everything you don’t want festering at the bottom of your machine.
If it’s not emptied regularly, it can overflow or start to smell… fast. So, make it a habit to pull out the tray at least once a day, more if your café is busy.
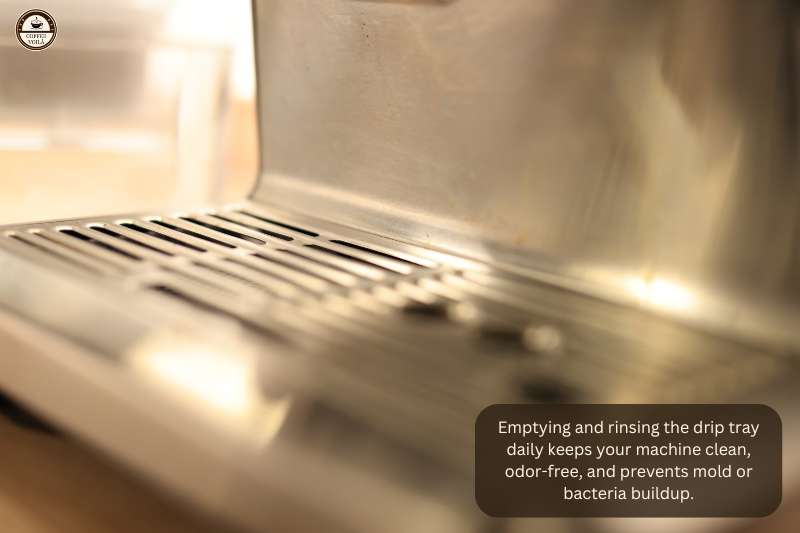
Then rinse it with warm water and scrub off any buildup with a soft sponge or cloth. Once a day, use a bit of mild detergent to fully clean the tray and its insert. Let it dry before sliding it back in.
A clean drip tray keeps things sanitary and prevents unwanted bacteria or mold from creeping in.
5 – Refill the Water Tank with Filtered Water
Always use filtered water when refilling your espresso machine’s water tank. Often tap water contains minerals like calcium and magnesium, which can lead to limescale buildup inside the boiler, pipes, and valves.
Over time, this buildup can reduce efficiency and affect water temperature. Both of which impact espresso flavor.
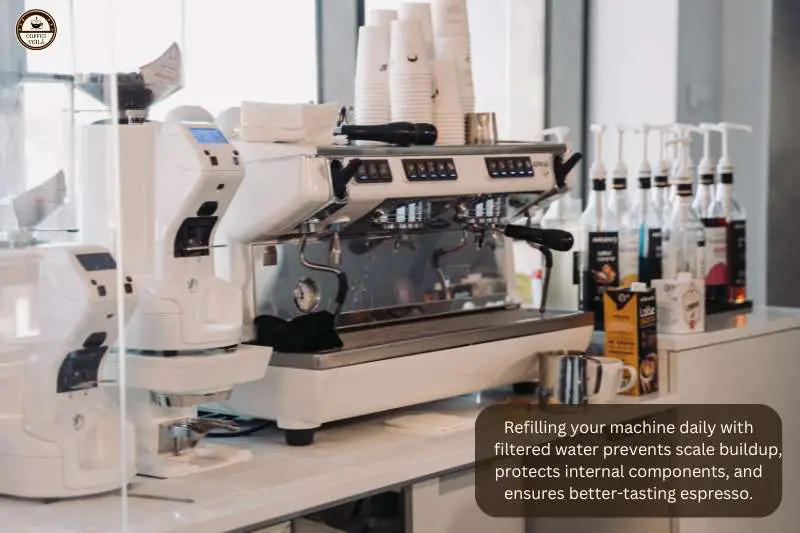
Also filtered water helps prevent unwanted tastes and odors from making their way into your shots. You’ll get a cleaner, more consistent cup, and your machine will last longer with fewer maintenance issues.
If you’re using a tank-fed machine, refill it daily with cold, fresh filtered water. I suggest it from a pitcher or under-sink system.
Don’t use distilled water unless the manufacturer specifically recommends it, as it can affect sensor readings in some machines.
Lastly, never let the tank run dry. That can cause damage to the heating element or pump. So, keep an eye on water levels throughout the day and top it off as needed.
6 – Clean the Grinder Hopper
Usually, old coffee beans leave behind oils that can go rancid over time. These oils and fine grinds cling to the inside of the hopper and the grinder chute, affecting flavor and causing clogs.
To clean the hopper, first unplug the grinder and remove any leftover beans. Afterward, wipe the inside with a dry cloth or brush to remove loose particles.
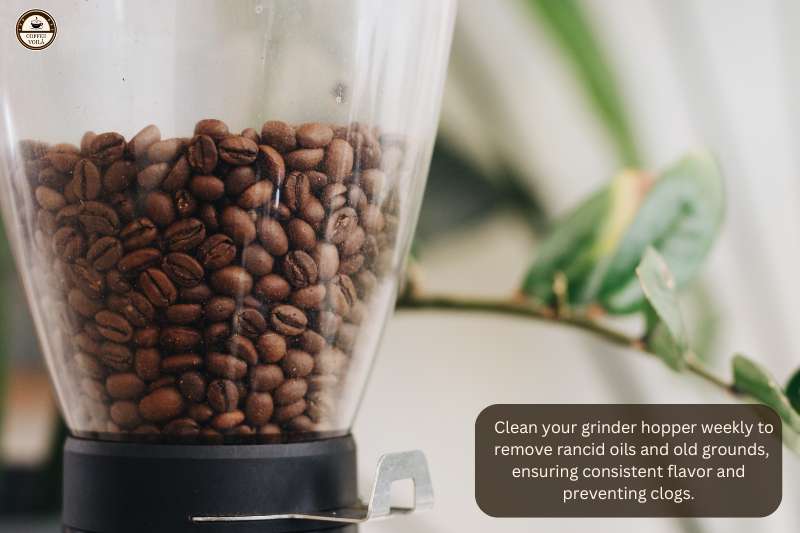
If there’s oil buildup, use a damp cloth with mild dish soap, then rinse and dry thoroughly before reassembling.
Furthermore, it’s smart to clean the chute using a small brush to clear out compacted grounds. The reason is regular cleaning helps maintain grind consistency, prevents stale flavors, and extends your grinder’s lifespan. I recommend doing this weekly or more often if you grind oily beans.
Weekly Maintenance Tips
Beyond your daily cleaning rituals, setting aside time each week for deeper maintenance can seriously extend the life of your espresso machine and keep your shots tasting clean and balanced.
7 – Deep Clean the Group Heads
Here’s something I learned the hard way: daily backflushing isn’t enough to keep your group heads totally clean. After a few months of thinking I was “on top of it,” my espresso started tasting dull—like something was smothering the flavor.
Turns out, old coffee residue had built up behind the scenes, gunking up the shower screen and the dispersion block.
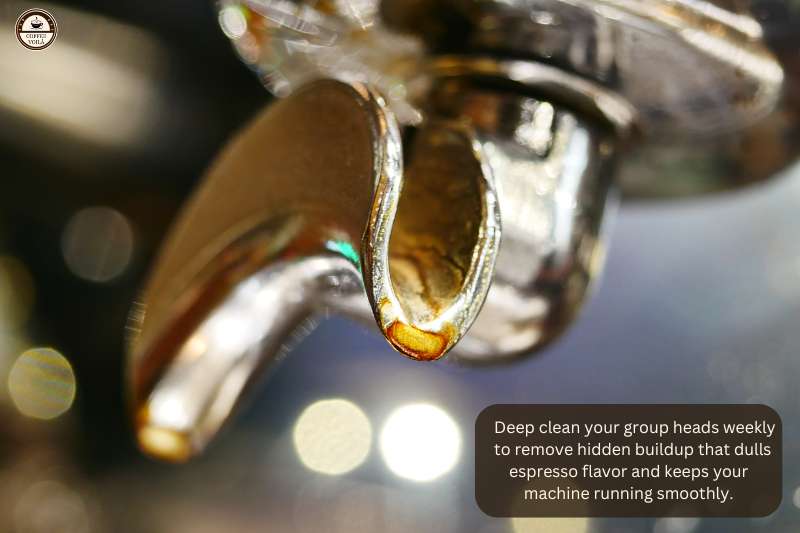
Now, I do a full deep clean every week without fail. I remove the screen, screw, and gasket (use a flathead and be gentle—don’t strip it), then soak everything in hot water with a cleaner like Cafiza overnight.
If you haven’t done this before, prepare to be mildly horrified by how much coffee grime comes off.
Next morning, I scrub the parts with a small brush, rinse well, and reassemble. I also take a peek up into the group head with a flashlight to make sure there’s no buildup left. It’s a little extra work, but honestly, the improvement in flavor is noticeable—and your machine will thank you too.
8 – Backflush with Detergent
If you’re only backflushing with water, you’re just rinsing. Over time, espresso machines build up coffee oils and fine grinds inside the group valve system that plain water can’t remove. That’s where a proper backflush detergent comes in.
I suggest using a blind filter (the basket with no holes), adding about half a teaspoon of espresso machine cleaners like Cafiza or Puro Caff, and running a few brew cycles.
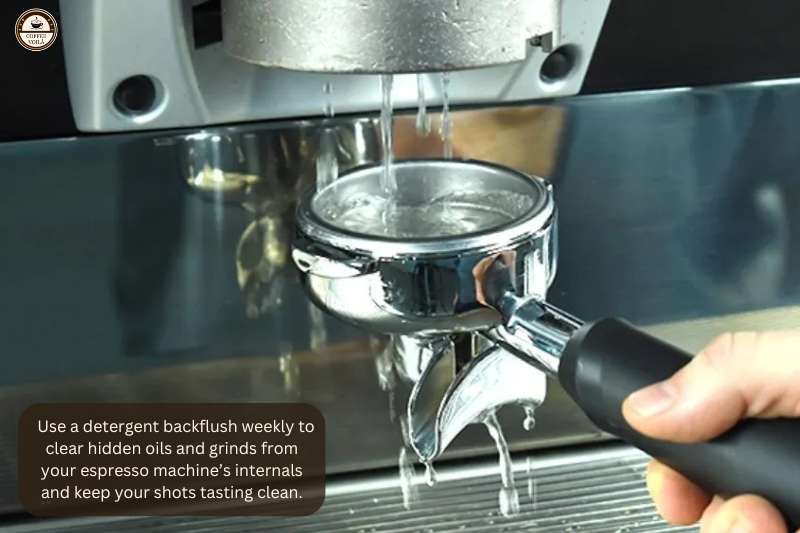
You’ll hear the pressure build and release. This helps push detergent through the system and scrub those hidden parts. After a few cycles, rinse with clean water several times until no detergent remains.
Detergent backflushing clears out gunk behind the shower screen, in the three-way solenoid valve, and along internal passages.
Also, it helps maintain consistent pressure, prevents clogging, and keeps your espresso tasting clean. You should do this at least once a week. And more often if you’re pulling dozens of shots a day.
9 – Descale the Machine If Needed
Limescale builds up over time especially if you’re using hard water. The problem is that it can seriously mess with your espresso machine’s performance.
Usually, it clogs internal pipes, affects water temperature stability, and even reduces pump pressure. If you’ve noticed slower brew times or weaker steam, it’s probably time to descale.
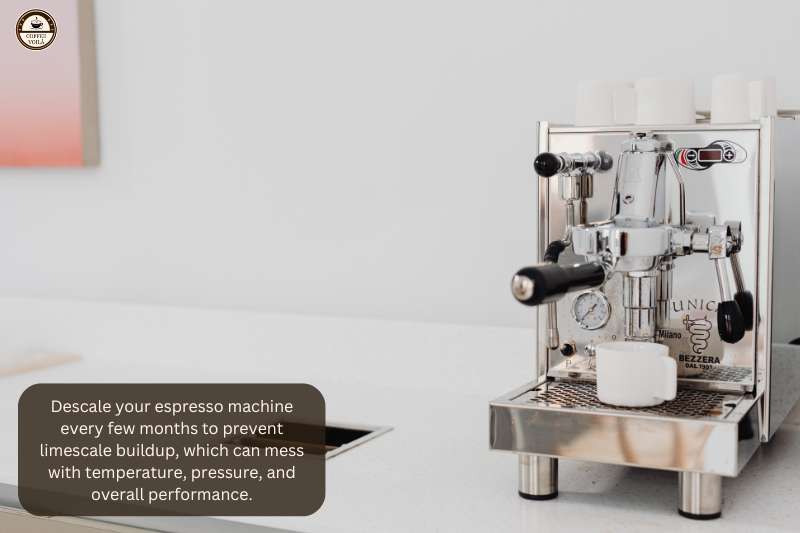
Start by checking your user manual to see how often your model needs descaling. Some machines have a built-in alert; others you’ll have to monitor manually.
Always use a descaling solution approved by the manufacturer. The reason is citric acid and vinegar can damage internal components on some models, especially those with aluminum boilers.
To descale, follow the instructions on your machine. Usually, it involves adding the solution to the water tank, running the brew cycle (and steam wand if applicable), then flushing with clean water.
Also, don’t rush the rinse stage. It’s just as crucial as the descaling itself.
If you live in an area with hard water, consider using filtered water to reduce buildup in the future.
Notes: Regular descaling keeps your machine running efficiently, prevents breakdowns, and helps preserve the taste of your espresso. I recommend doing it every 2–3 months or more frequently if your water is particularly mineral-rich.
10 – Inspect the Steam Wand Tip
To keep milk frothing consistent and smooth, you need to regularly inspect the steam wand tip. Over time, tiny bits of milk can dry and harden inside the tip’s holes.
This can lead to blockages that mess with steam pressure and create uneven froth, resulting in sputtering steam or no steam at all. Definitely not ideal for lattes or cappuccinos.
For this, use a small pin, needle, or the cleaning tool that often comes with espresso machines to gently poke each hole in the steam wand tip.
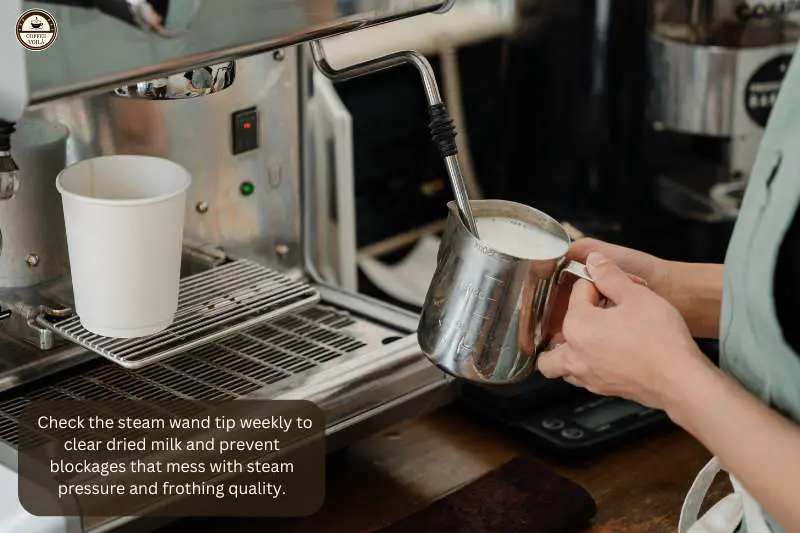
Furthermore, make sure the machine is turned off and the wand has cooled down completely before doing this. You should avoid forcing the pin too hard. Remember, you’re only clearing out the gunk, not widening the holes.
If the wand tip is removable, take it off and soak it in warm water mixed with a bit of espresso machine cleaner or descaling solution. This helps break down any milk residue or mineral deposits inside.
After cleaning, flush the steam wand briefly to ensure it’s clear and steaming properly. This simple weekly task ensures consistent milk texture, better microfoam, and keeps your drinks tasting clean and fresh.
Also, it extends the life of your steam wand—so it’s a win all around.
11 – Clean the Water Softener or Replace Filters
If your espresso machine has a water softener or internal filtration system, don’t ignore it. This is doing the heavy lifting to protect your machine from hard water damage.
Over time, mineral deposits can clog internal pipes, mess with temperature consistency, and even damage the boiler. That’s why keeping your filter clean or replacing it on schedule is key.
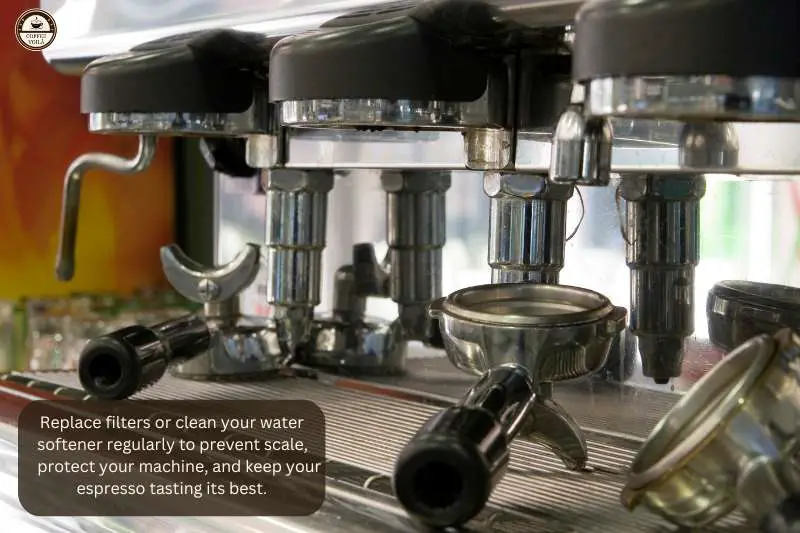
Most water softeners need to be regenerated with salt or rinsed every few weeks, depending on how often you use your machine and your local water hardness.
If you’re using a resin-based softener, follow the manufacturer’s directions. Usually it’s a simple flush with a salt solution.
On the other hand, cartridge filters typically need swapping every 2 to 3 months, though some high-use setups may require it more often.
Notes: Neglecting this step doesn’t just risk scaling. But it also affects the taste of your coffee. The fact is clean water means a cleaner cup.
If you’re not sure about your local water hardness, you can grab test strips online or at a hardware store. A quick check now can save you from a pricey repair later.
Monthly Maintenance Tips
Take time each month to catch the little things before they become big ones.
12 – Check Pump and Boiler Pressure
You should always keep an eye on both pump and boiler pressure. These two systems control everything from your shot quality to steam performance. If the pressure’s off, your espresso could run too fast, too slow, or taste flat.
So, start by checking the machine’s built-in gauges. For most commercial machines, boiler pressure should stay between 1.0 to 1.2 bar, and pump pressure should hit around 9 bar during extraction.
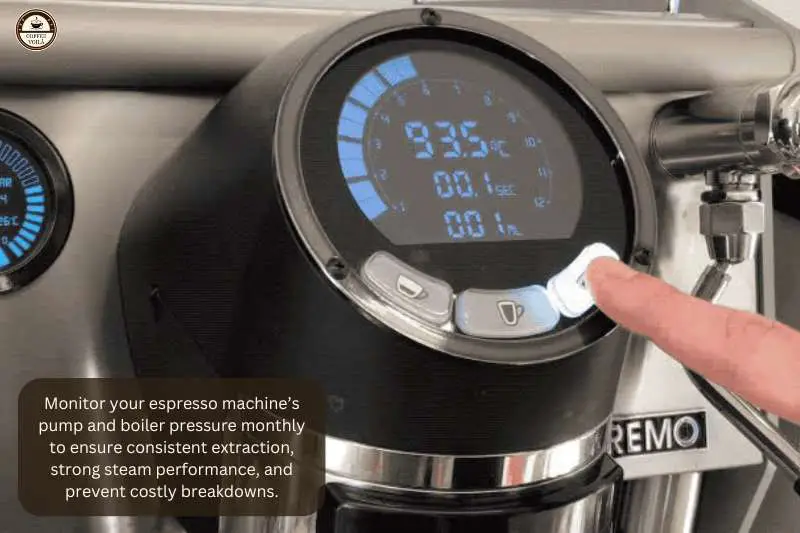
If either number is too high or too low, pause and investigate. It might be a simple fix like a clogged line or dirty group head. Or something more technical, such as a worn-out pump or faulty pressurestat.
And don’t guess when it comes to pressure readings. Use your machine’s manual or manufacturer website to confirm the ideal range.
If adjusting the pressure feels risky or unfamiliar, it’s best to leave it to a certified technician. Because tinkering with the wrong valve can cause more harm than good.
Notes: Steady pressure means consistent shots, reliable steaming, and a longer lifespan for your espresso machine. For this reason, you should check it monthly. It only takes a few minutes, but it can save you from major headaches (and repairs) later on.
13 – Inspect Gaskets and Seals
Every month, take a few minutes to inspect the gaskets and seals around your group head and steam wand. These rubbery parts deal with heat and pressure daily.
For this reason, wear and tear is inevitable, especially in busy commercial settings. If they start to crack, harden, or leak, you’ll likely notice poor espresso extraction or steam escaping where it shouldn’t.
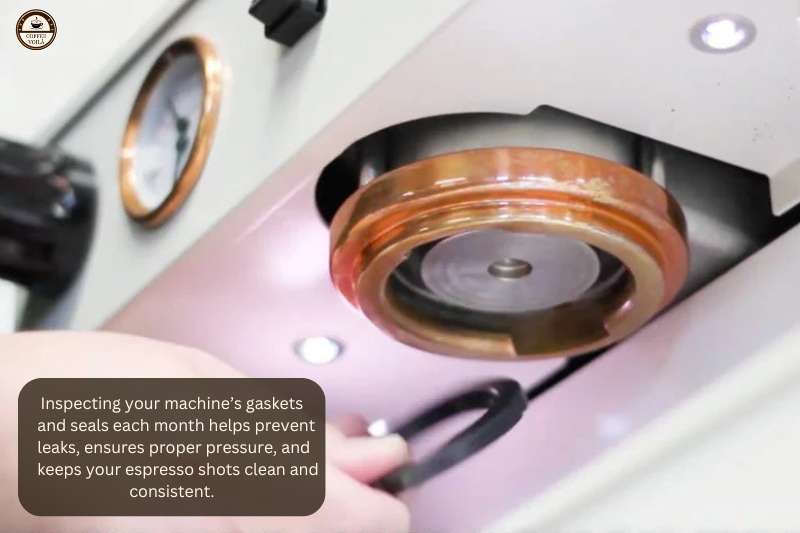
You can start with the group head gasket. Power off your machine, let it cool down, and use a flashlight to check for any fraying or cracking around the gasket ring.
If you see coffee buildup or the gasket feels stiff to the touch, it’s probably time to replace it. A worn gasket can cause the portafilter to wobble or leak under pressure.
Next, check the steam wand’s seals and any O-rings in the hot water outlet. If there’s water leaking where it shouldn’t be, don’t ignore it. Plus, seals are cheap, but damage from long-term leaks isn’t.
Notes: Most gaskets need replacement every 6 to 12 months. However, heavy use may shorten that window. So, keep spares on hand. It’s a quick fix that’ll save you downtime later. Swapping out a gasket takes maybe 10 minutes and keeps your machine running smooth and safe.
14 – Calibrate the Grinder
Over time, even a high-end grinder will drift slightly due to burr wear, humidity, or bean density changes. That shift can throw off your espresso shot times and flavor balance without you even realizing it.
So, start by checking your current shot time. If you’re pulling a double shot and it’s suddenly flying through in 20 seconds instead of your usual 28 to 30, it’s time to recalibrate.
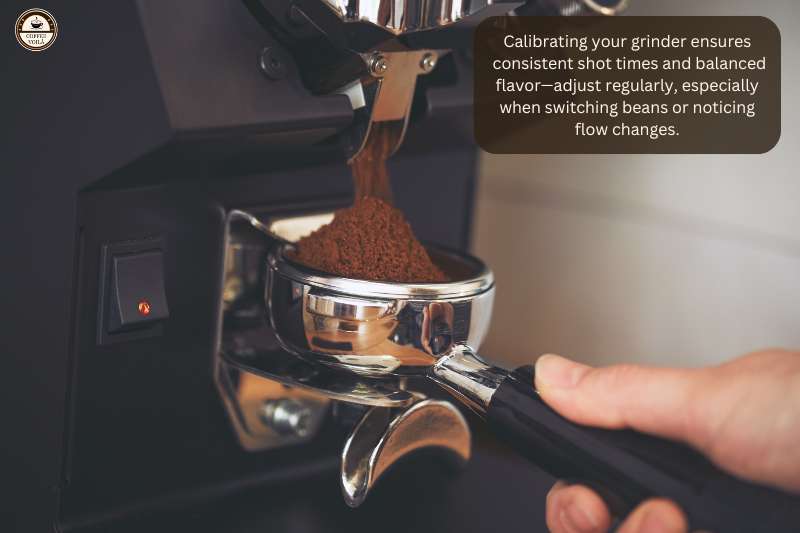
You should run a few test shots, adjusting the grind finer or coarser depending on how the espresso is flowing. A grinder dial or micro-adjustment wheel makes this much easier. However, even basic models require regular adjustments.
It’s also a good idea to purge a small amount of coffee after each adjustment to get rid of old grinds stuck in the chute. And always weigh your dose. You shouldn’t rely on eyeballing it.
Keeping dose and grind consistent means your espresso flavor will be too.
If you’re switching beans, even between two medium roasts, expect to recalibrate again. Because every coffee behaves differently.
15 – Clean the Brew Group (If Removable)
For super-automatics and certain commercial machines. If your espresso machine has a removable brew group, as many super-automatic machines do, this step is essential.
The fact is coffee oils and fine grounds love to sneak in and build up around the brew unit, especially in corners you can’t see at a glance. Over time, that gunk leads to bitter flavors, mechanical issues, or worse complete blockages.
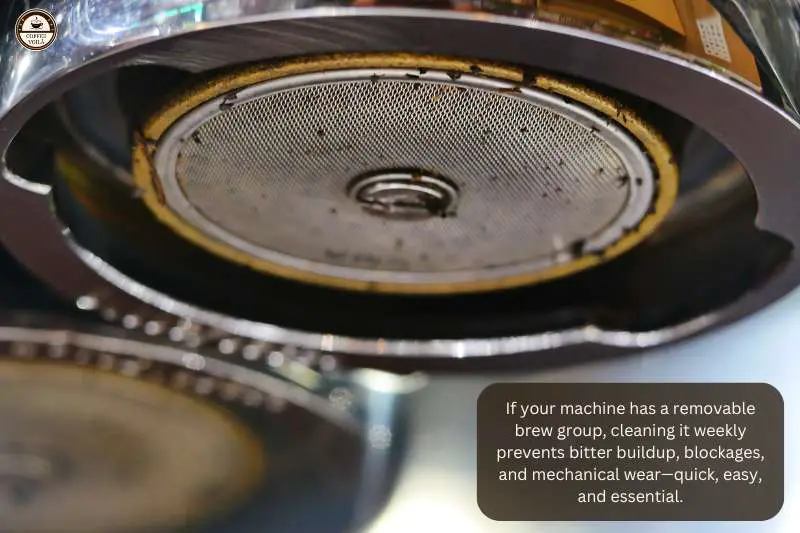
The good news? Usually, it’s pretty easy to access. Most models let you pop open a side or rear panel and slide the brew group out with a click.
Once it’s out, rinse it under warm water and no soap. Then scrub off any visible residue using a soft brush or cloth. Afterward, let it dry completely before popping it back in.
Once a week is a solid cleaning routine. However, if you’re pulling 20+ shots a day, you might want to do this every couple of days. Check your manual for specifics, because some machines require a bit of food-safe grease on moving parts during reassembly.
Furthermore, don’t forget to clean inside the chamber where the brew group sits. Often grounds love to hide there.
Notes: A clean brew group keeps your espresso tasting right and prevents wear and tear on your machine’s internals. Definitely worth the 5-minute job.
Long-Term Maintenance & Pro Tips
Here’s where the real longevity gains come in.
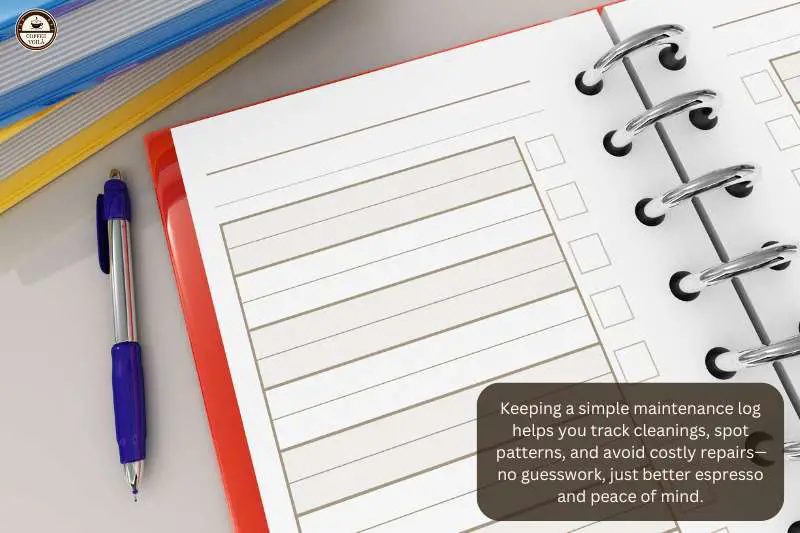
16 – Keep a Maintenance Log
If you’ve never kept a maintenance log before, don’t worry—it’s nothing fancy. A notebook, spreadsheet, or even a note on your phone works fine.
The idea is to jot down each time you do something like backflushing, descaling, changing water filters, or checking the pump pressure.
It might sound overkill at first, but over time it saves you from trouble. You’ll start spotting patterns. For instance, how often your steam wand gets clogged or when your group gasket usually starts wearing out.
And when something goes sideways with your espresso machine, you’ll have a clear record to show a tech or refer back to.
Plus, it’s helpful for warranty claims or service appointments. Most manufacturers will ask when you last cleaned or serviced something, and vague answers don’t help.
With a proper log, you can say, “Yep, descaled it six weeks ago with a Durgol solution,” and you’re taken seriously.
Notes: I’d recommend logging the date, what was done, any notes about performance changes, and any parts you swapped. You don’t have to be perfect, only consistent.
17 – Schedule Professional Servicing (Every 6–12 Months)
Even if you’re staying on top of your daily and monthly cleaning, there’s stuff inside your espresso machine that only a pro should touch.
I’ve learned that a certified technician can spot wear-and-tear on parts like the pressurestat, solenoid valves, or internal seals long before they fail.

Depending on how much use your machine sees, plan to book professional servicing every 6 to 12 months. For high-traffic cafés, you want closer to the 6-month mark.
If you’re running a home setup or a slower shop, you might stretch it out to a year. But don’t skip it entirely.
When they come in, they’ll do a full check-up: pressure tests, electrical diagnostics, boiler inspection, and commonly a full internal clean with food-safe products.
Also some techs calibrate temperature sensors and replace group gaskets and shower screens while they’re at it.
Notes: It may cost a bit. But think of it as insurance for your espresso gear. The fact is regular servicing keeps your coffee taste consistent. Furthermore, it prevents breakdowns and seriously extends the lifespan of your machine.
18 – Train Staff on Proper Use and Care
Most long-term problems? They don’t come from wear and tear. Instead, they come from people not knowing how to use or clean the machine properly.
So, training your staff isn’t just about pulling a good shot. It’s about understanding how the machine works. For instance, things like preheating the portafilter, not yanking the steam wand around like a joystick, and wiping down the group head after every use matter. Those small habits add up.

I suggest creating a checklist for each shift: backflush the machine, purge the steam wand, clean the baskets, check the water tank, wipe down the drip tray. Afterward, post it somewhere visible. And I mean visible (not buried in the staff binder where no one reads).
Also, make time to explain why these things matter. When someone understands that skipping a rinse cycle can gum up the solenoid valve, they’re way more likely to stay consistent.
Last Thoughts
Got a tip you swear by? Or a cleaning hack that’s saved your shots more than once? I’d like to hear your comments below. And if you found this guide helpful, give it a share or pass it along to someone whose machine could use a little love.